Sharing glimpses of life, adventure, favorite things, and DIY projects while enjoying the serendipity of it all! Designer and photographer wanna be, wife, and dog mom. Home of Oliver Ann Designs.
We’ve never really given ourselves a budget for the renovations we have completed thus far in our house, but we do try to be mindful of cost. One thing I stumbled upon when we were renovating the first bathroom was Amazon Warehouse. I don’t think many people are aware of this or how to locate it on Amazon so I wanted to share the things I learned when I happened upon it.
To begin, search for the item you are looking for- for example ‘oil rubbed bronze shower faucet set’…
On the desktop site if you see more buying choices under the product you are looking for, click on that and it will take you to additional buying options. This is where you can find if an item has an Amazon Warehouse option. On the app just scroll down on the products page to see if has more buying choices.
In our experience Used – Like New means the item looks brand new with no imperfections or issues. They also give you a description of what is wrong with the item if it is not Used – Like New.
I have saved a ton of money by stumbling upon the Warehouse feature on Amazon. I purchased the sink faucets for both bathroom renovations from the Warehouse (3 faucets total), the shower trim kit for our master bathroom, the humidity sensing bathroom fans for both bathroom renovations, and the drawer pulls for the guest bathroom vanity. We have not had any problems with any of the items. On occasion the box might be damaged, but that will be indicated. All of the Warehouse items I have purchased shipped via Prime shipping.
Enjoy that Warehouse feature and always be sure to shop around because you would be surprised how much money you can save on some items compared to purchasing them through big box home improvement stores! Lighting, plumbing fixtures, cabinet hardware…you name it!!
Have a great weekend and happy shopping!!
PS- a lot of products are available through the Warehouse, not just items like I mentioned…do yourself a favor and check it out!!
Disclosure
This blog is a personal blog written and edited by me. For questions about this blog, please contact oliveranndesignsco@gmail.com. This blog abides by word of mouth marketing standards. We believe in the honesty of relationships, opinions, and identity. The blog’s owners are not compensated to provide opinions on products, services, websites, and/or other topics. The views and opinions expressed on this blog are purely ours as the blog owner. If we claim or appear to be experts on certain topics, products, or service areas, please know we will only endorse products or services that we believe, based on our expertise, are worthy of such endorsement. Any product claim, statistic, quote or other representation about a product or service should always be verified with the manufacturer or provider. This blog does not contain any content which might present a conflict of interest. As an Amazon Associate, I earn from qualifying purchases if the blog post contains affiliate links.
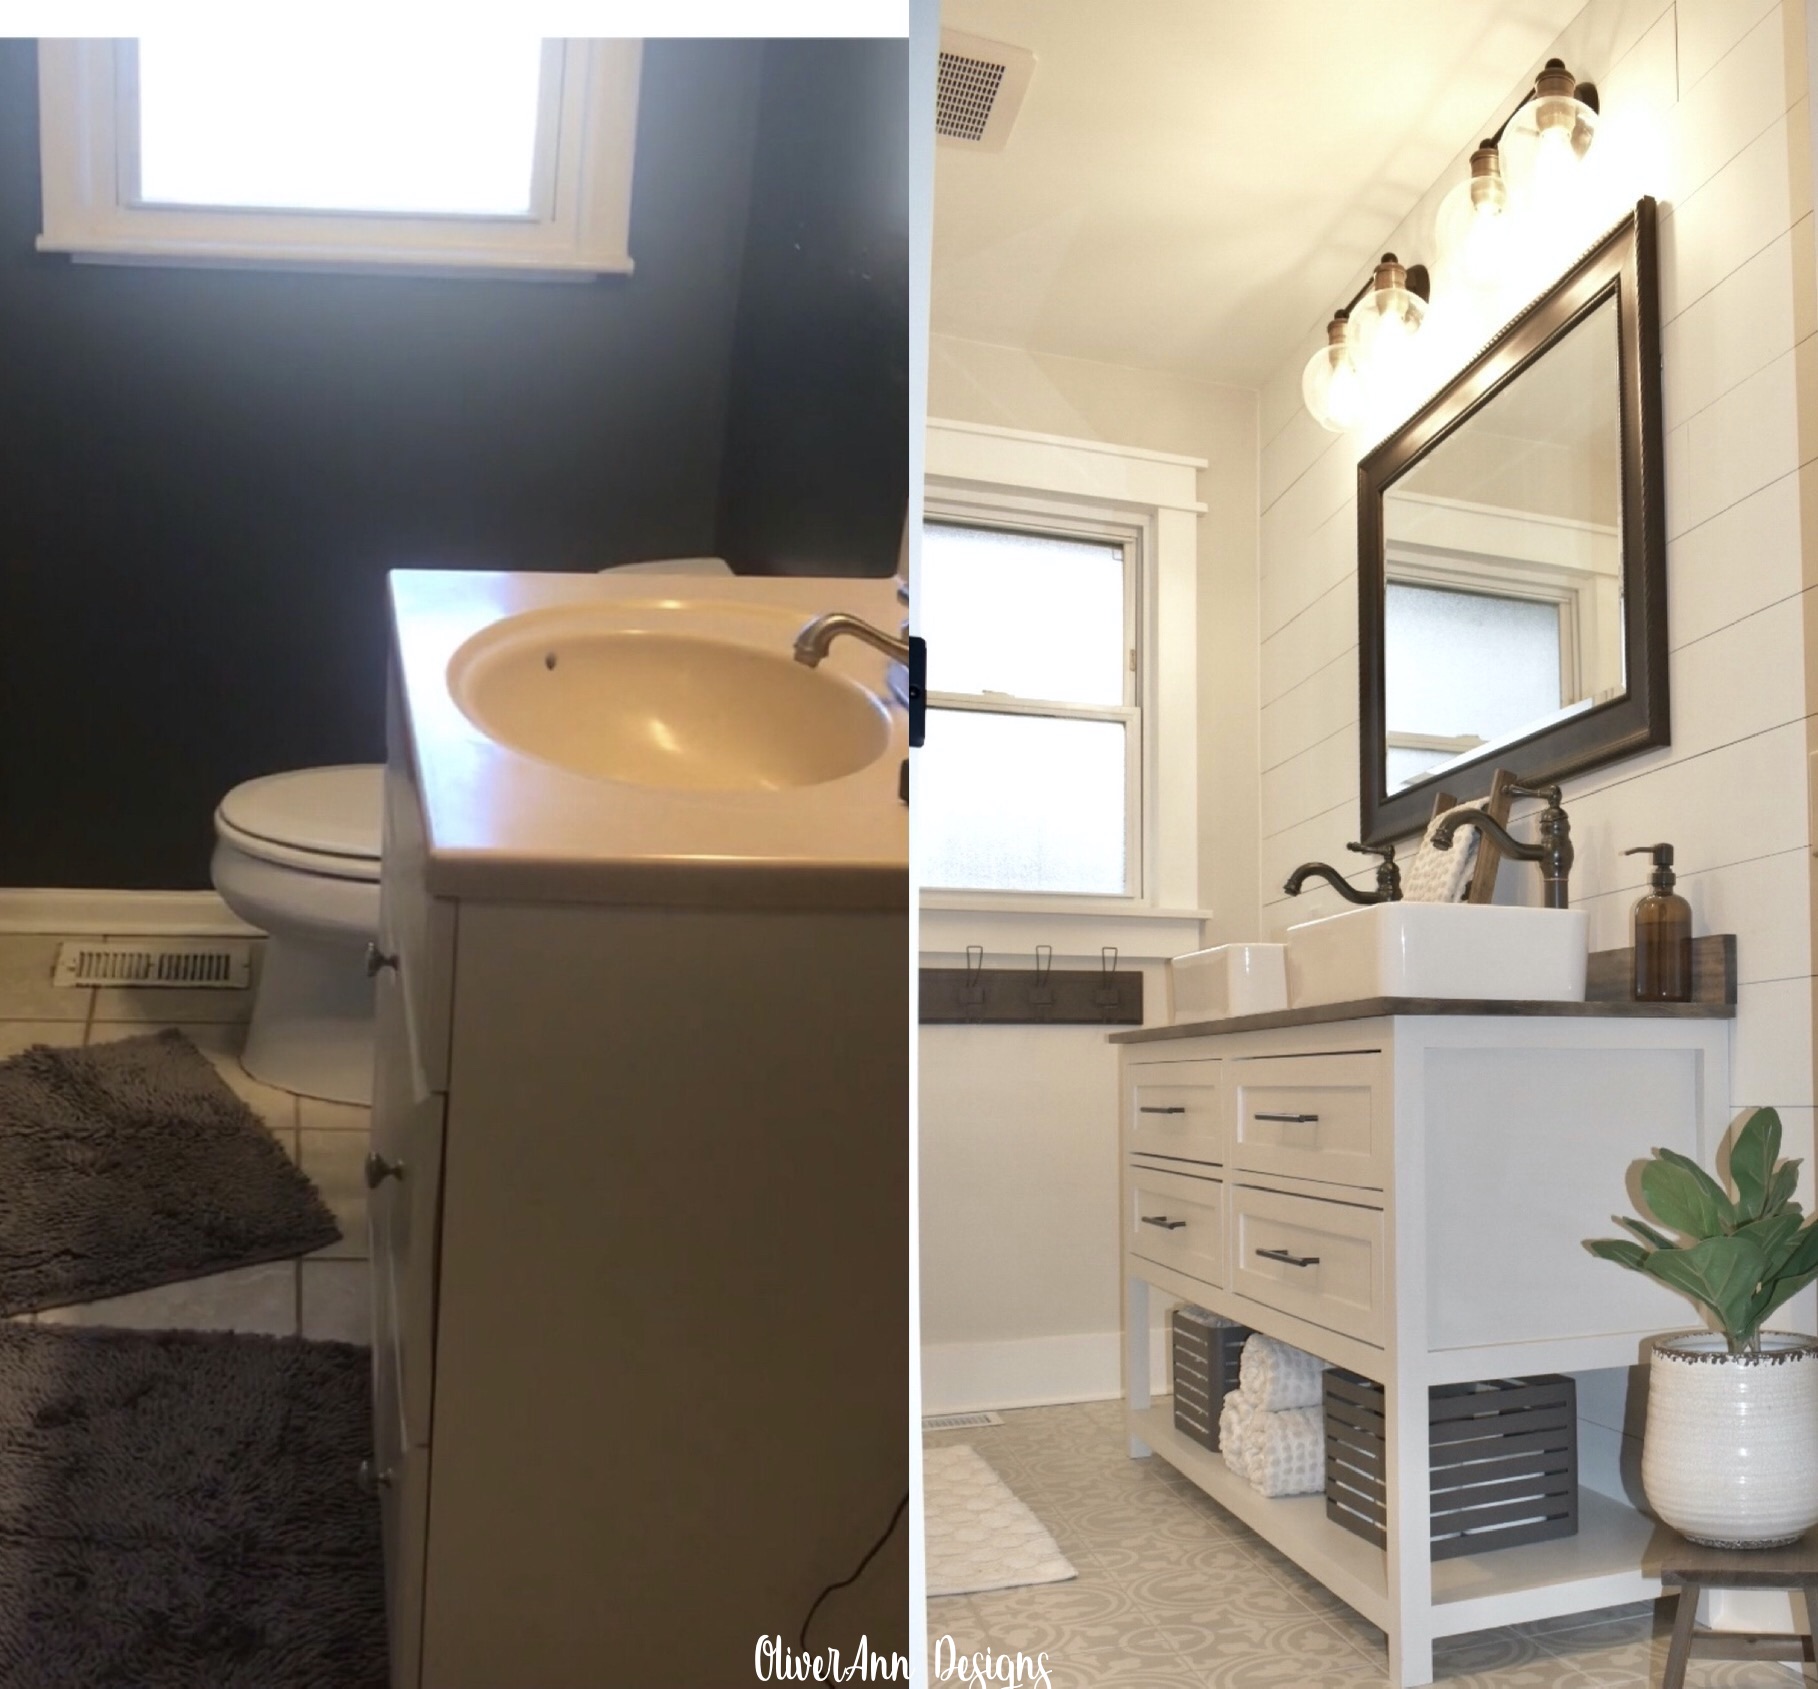
Y’all, thank goodness this house only has two bathrooms, and they are now both renovated (insert hallelujah hands here). This bathroom was just supposed to be cosmetic with moving the toilet and it turned into a total renovation when we found some pretty significant water damage to a couple of floor joists. I won’t get into all the painstaking details (I will tell you that the corners of the drywall in that room had duct tape on them instead of drywall tape- eye roll) but I do want to share some pictures and some of the products we used in this renovation. If you follow me on Instagram you will recognize these pictures.
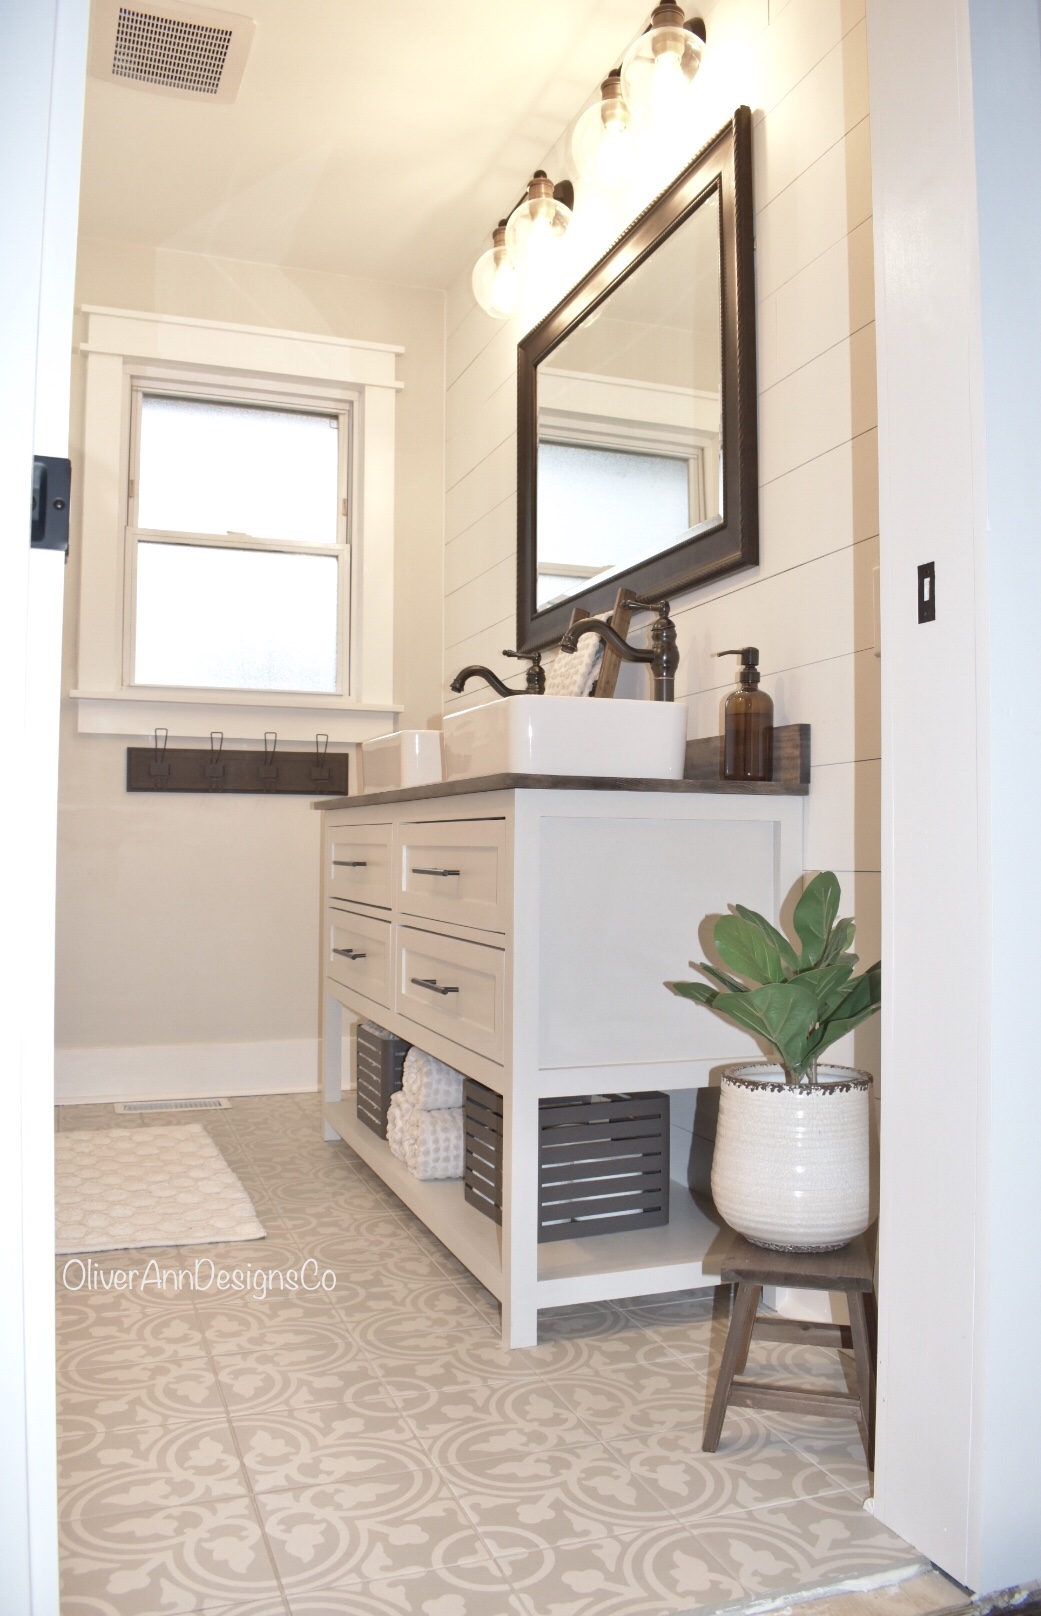
My design thought process for this bathroom was something that felt almost spa-like, welcoming and refreshing. Farmhouse modern with a little Boho thrown in there. It drives the hubs crazy but I always keep resale in the back of my mind with renovations because we don’t know if this house will be a forever home. I want our renovations to be what we want, but I also don’t want to make them to where it might be hard to sell one day. I knew I wanted a double vanity in this bathroom, that required moving the toilet in the space that was once the linen closet. This wasn’t a huge deal because we will have a space for the linen once we build the pantry in the kitchen.
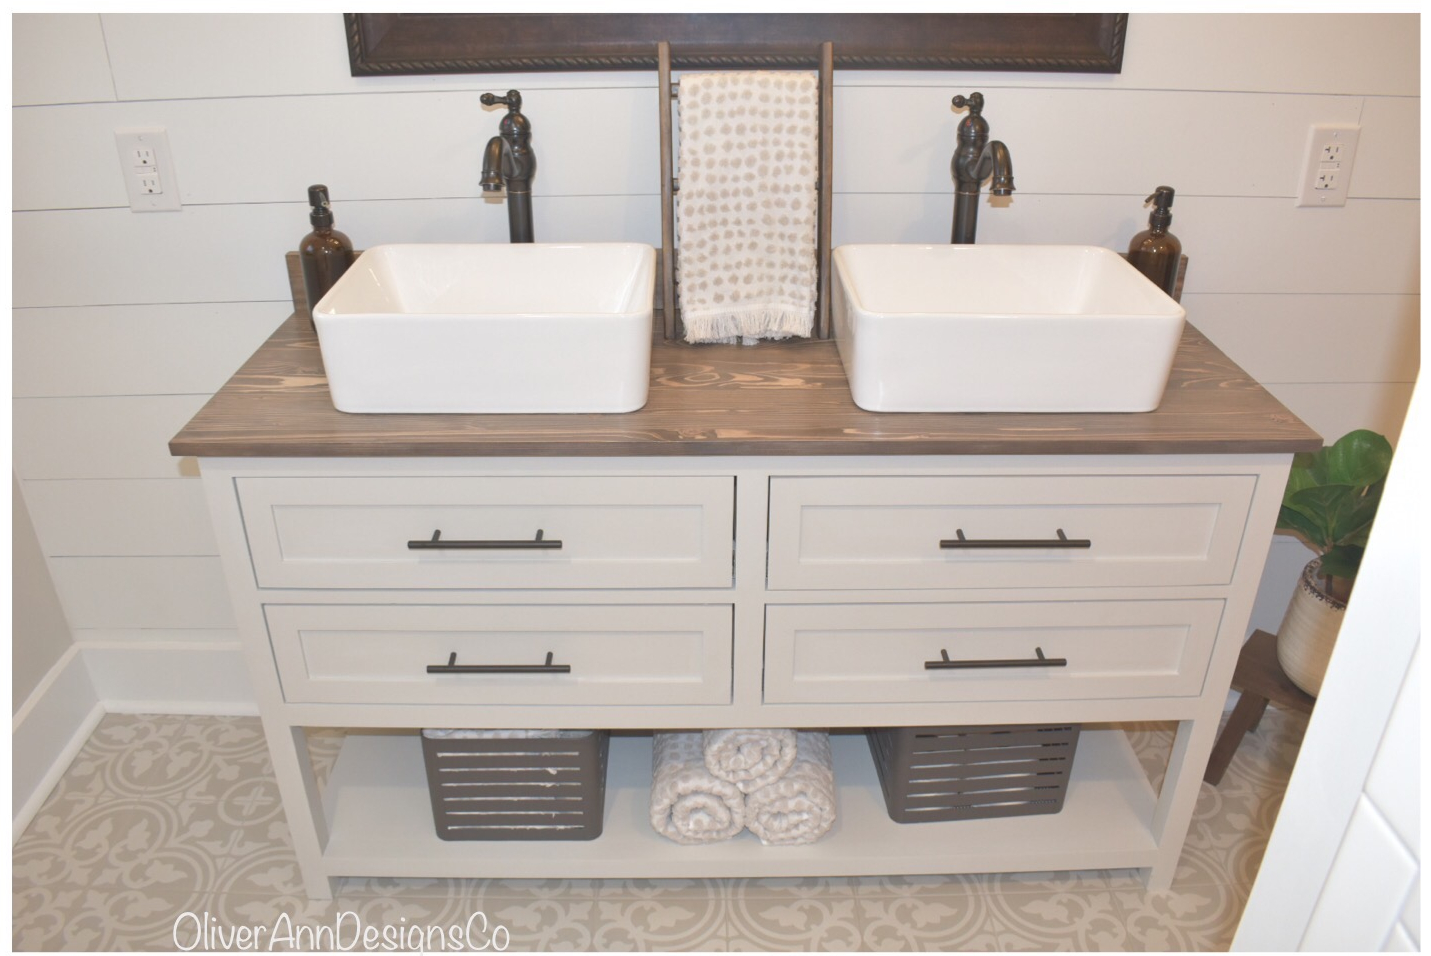
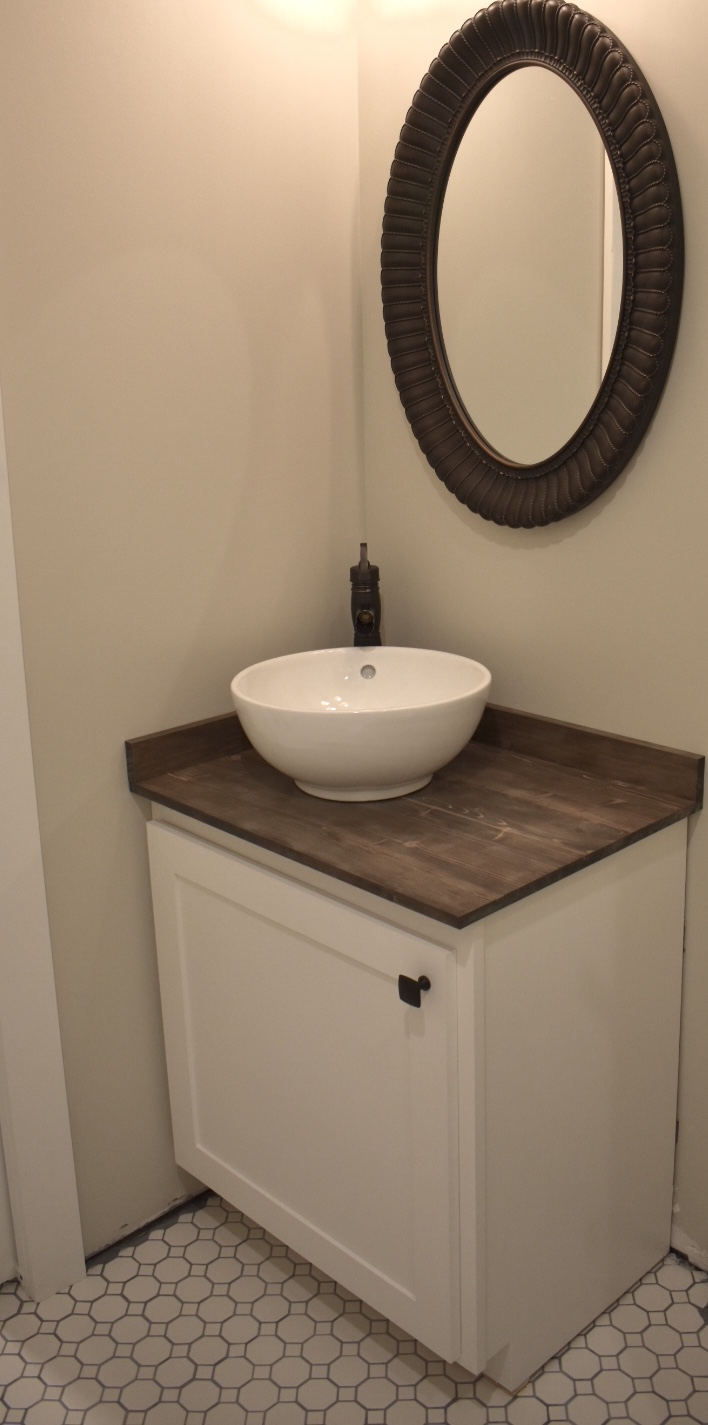
The hubs built the vanity because the size we needed was not standard and it would have been very expensive to buy one. I found a design plan on Pinterest and he adjusted it to make it work for the bathroom. We painted it Agreeable Gray because the faux shiplap is Cotton White by Sherwin Williams. The vanity has four functional drawers and the shelf underneath for storage. I finished the top the same way I finished the vanity top in our other bathroom, inspired by Restoration Hardware weathered oak finish. We got our 16×12 vessel sinks, the faucets, and the drawer pulls from Amazon.
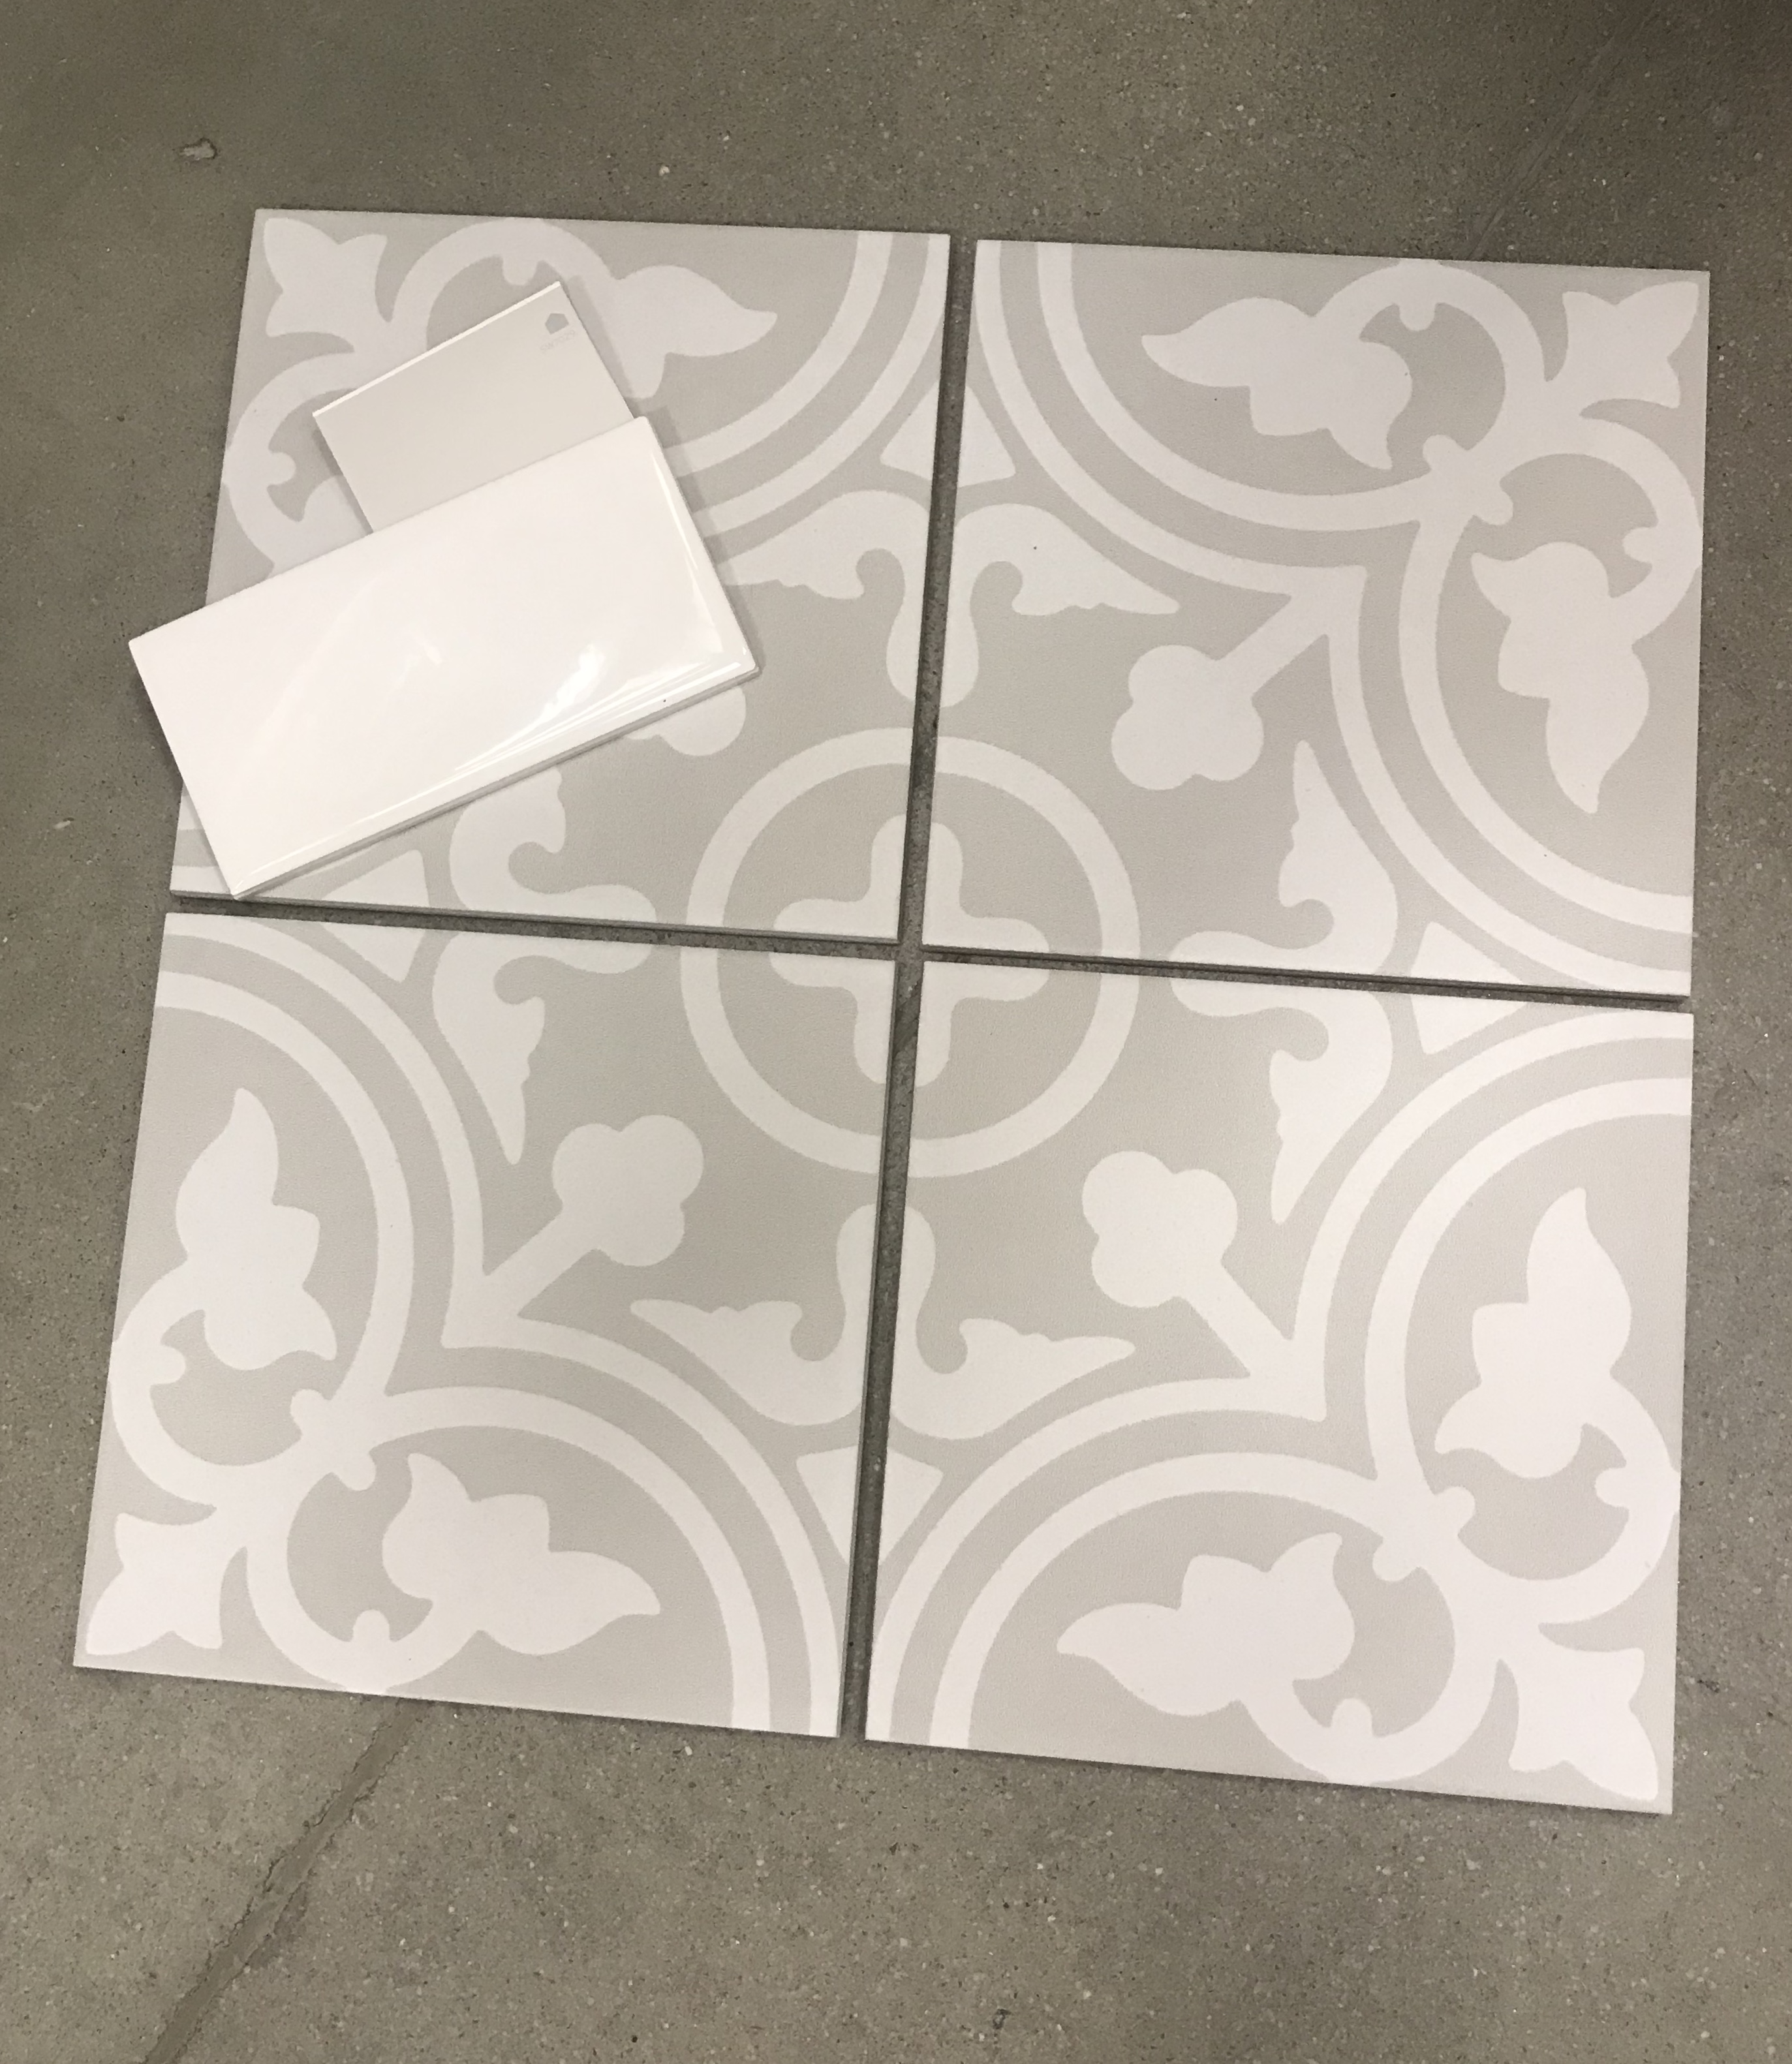
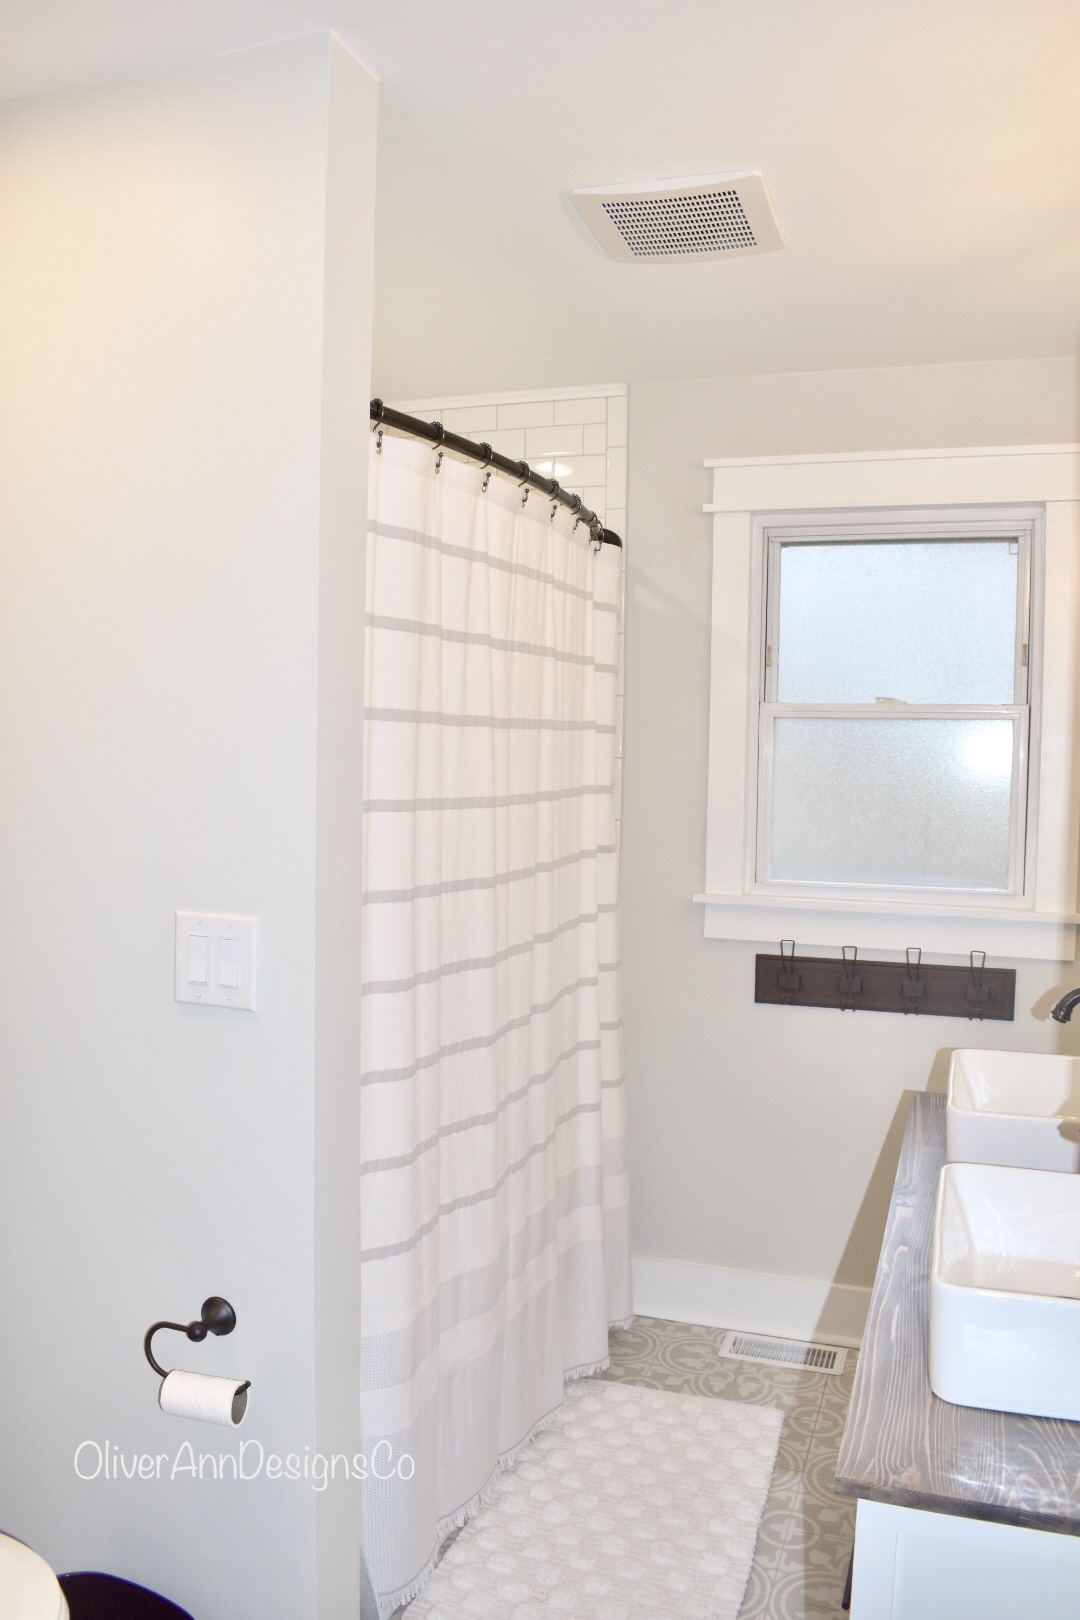
I went back and forth about the patterned floor tile for a while but I am so glad I ended up going with my gut and picking it! It really looks fantastic and it matches the wall color (Agreeable Gray by Sherwin Williams) perfectly.
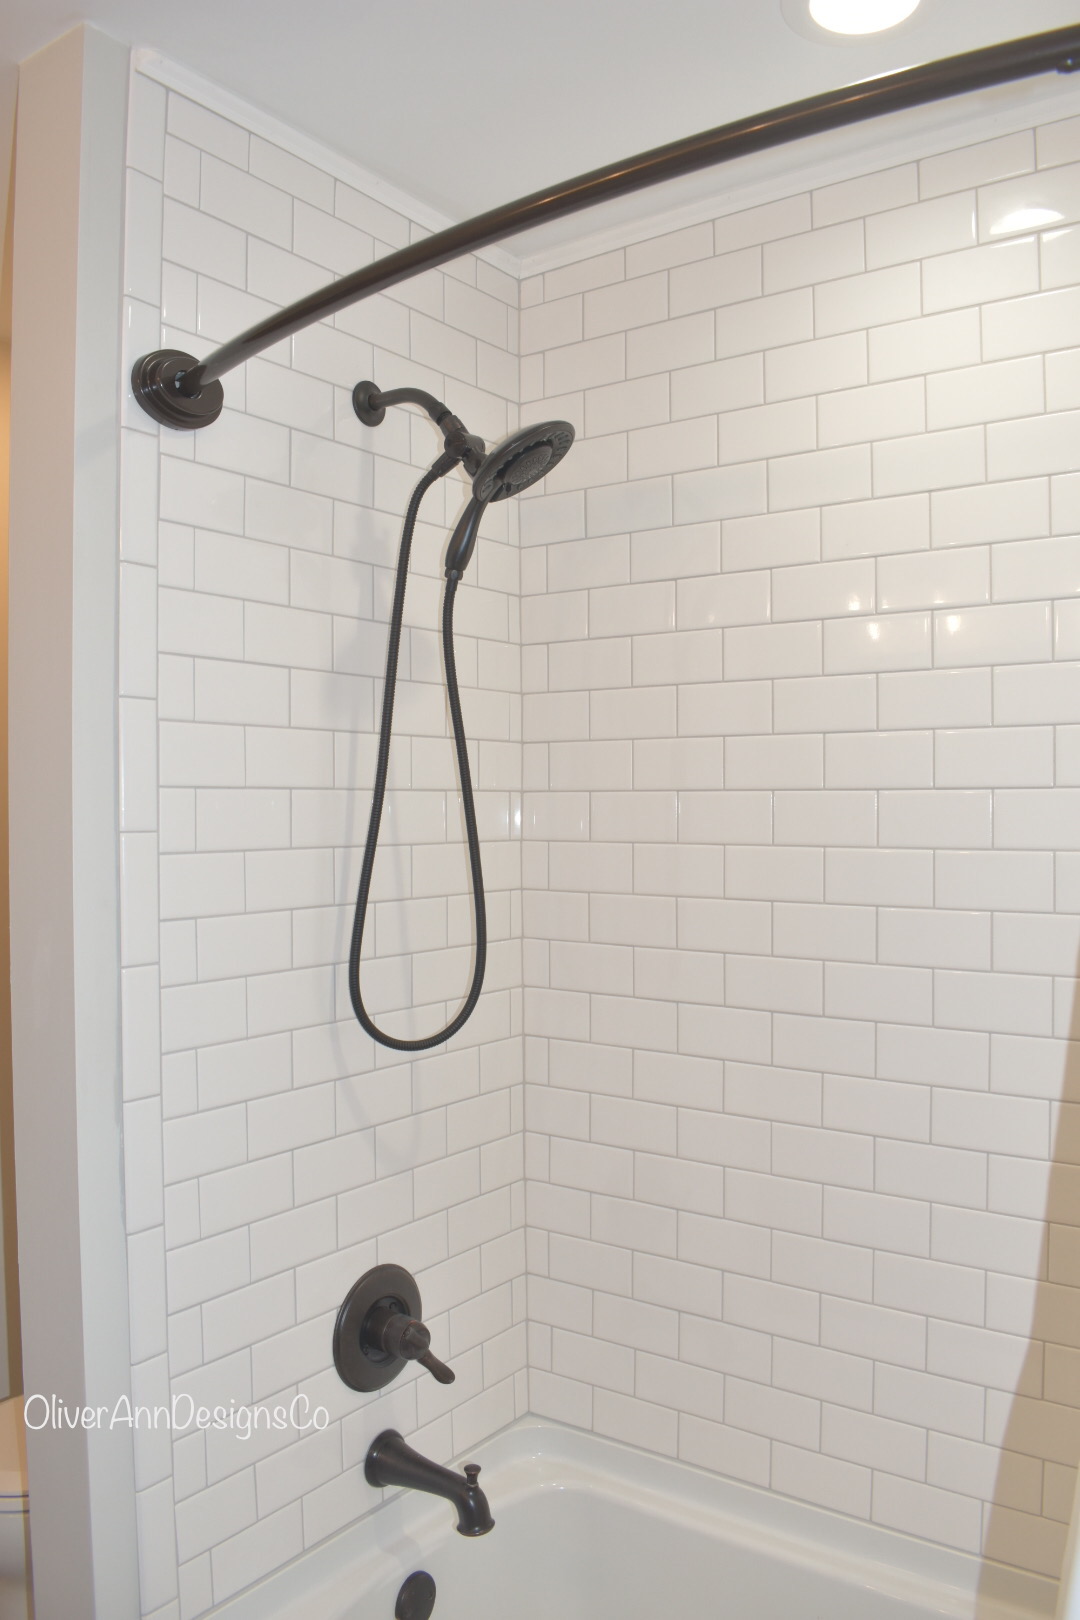
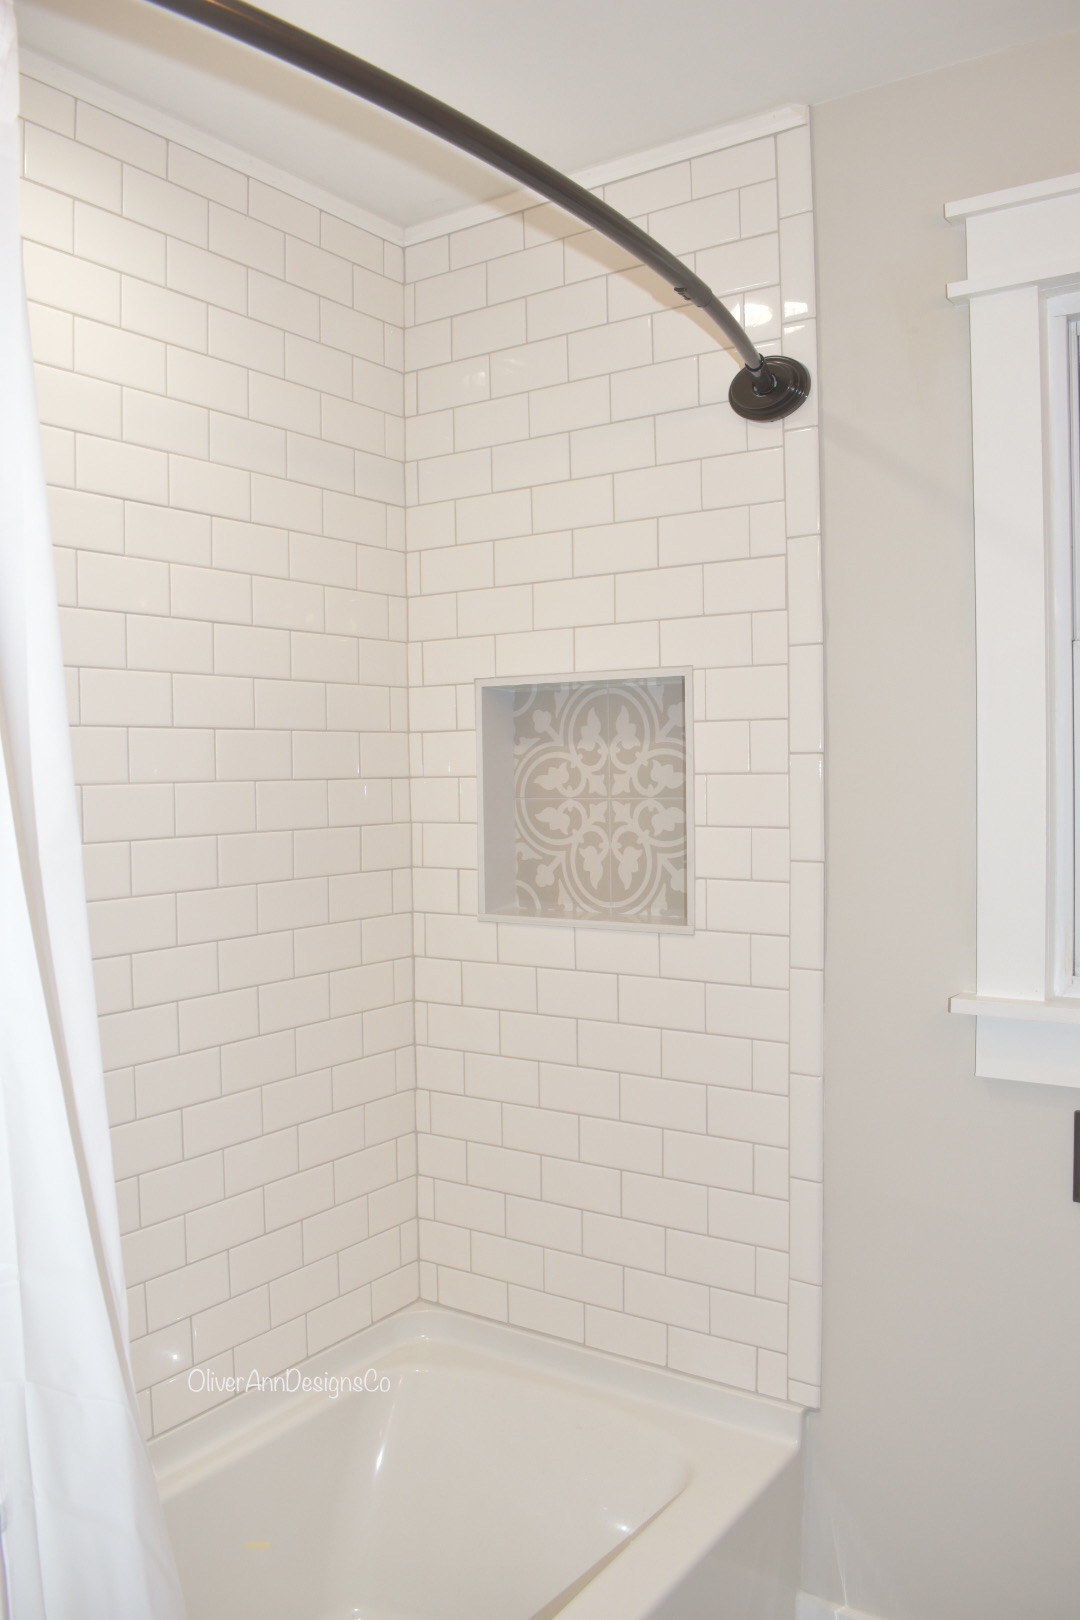
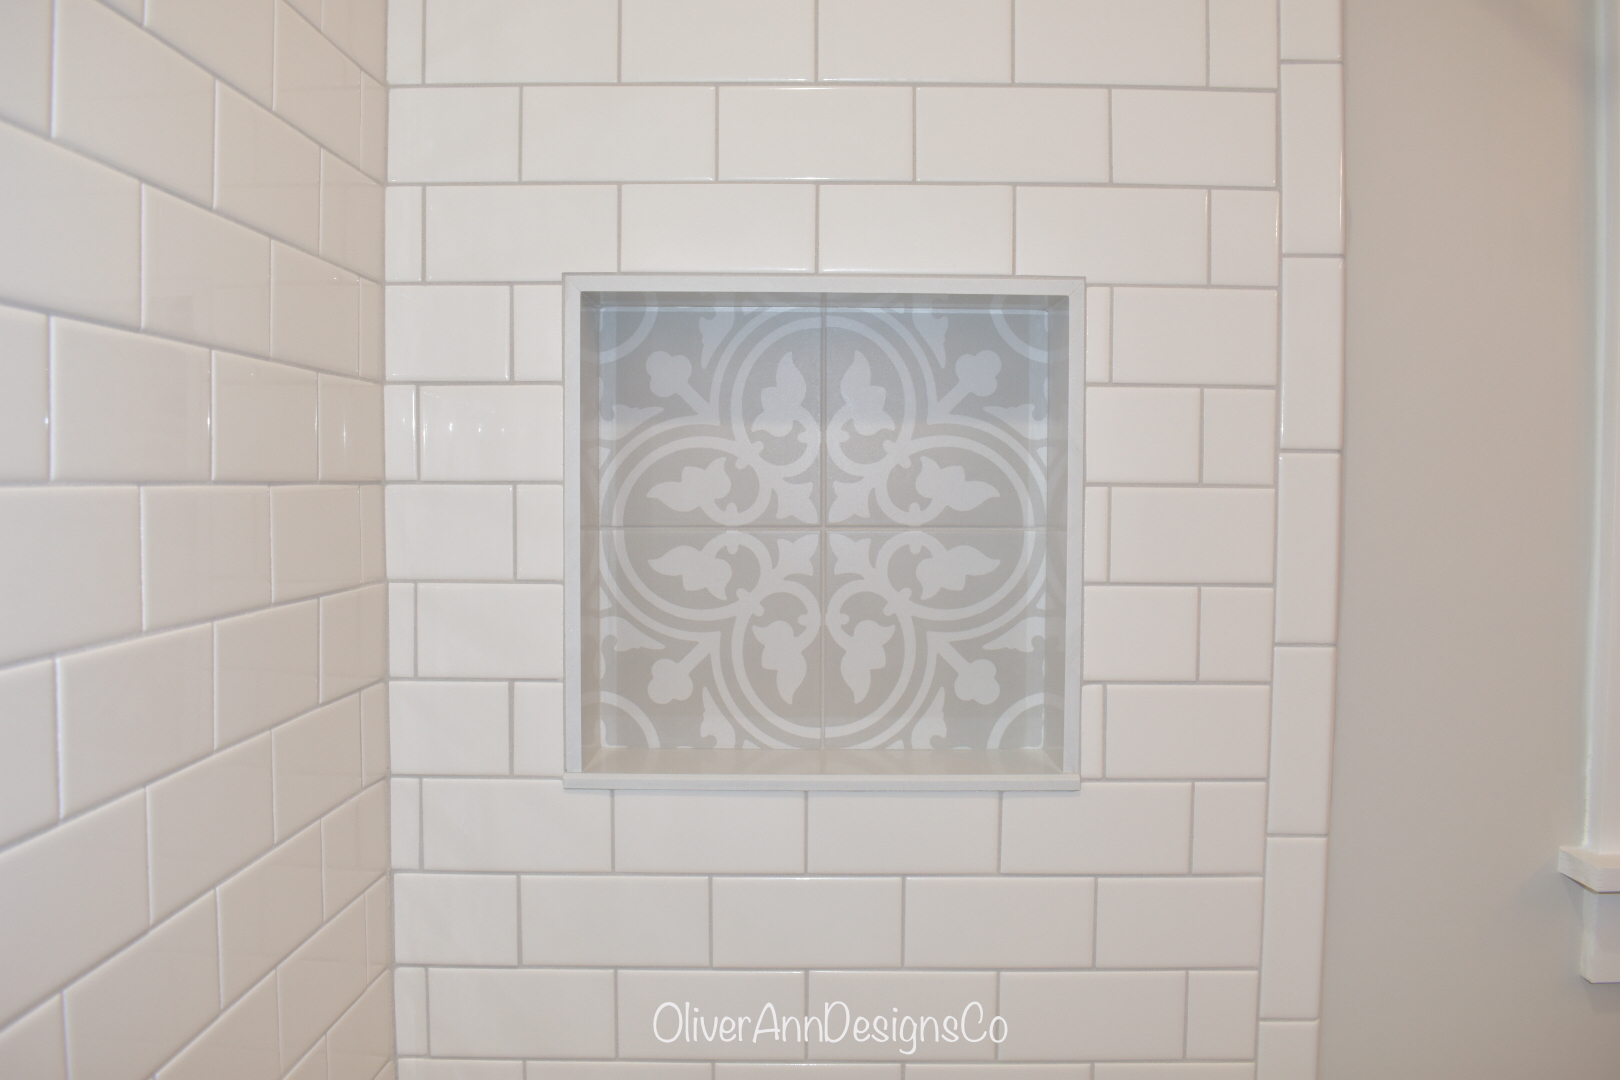
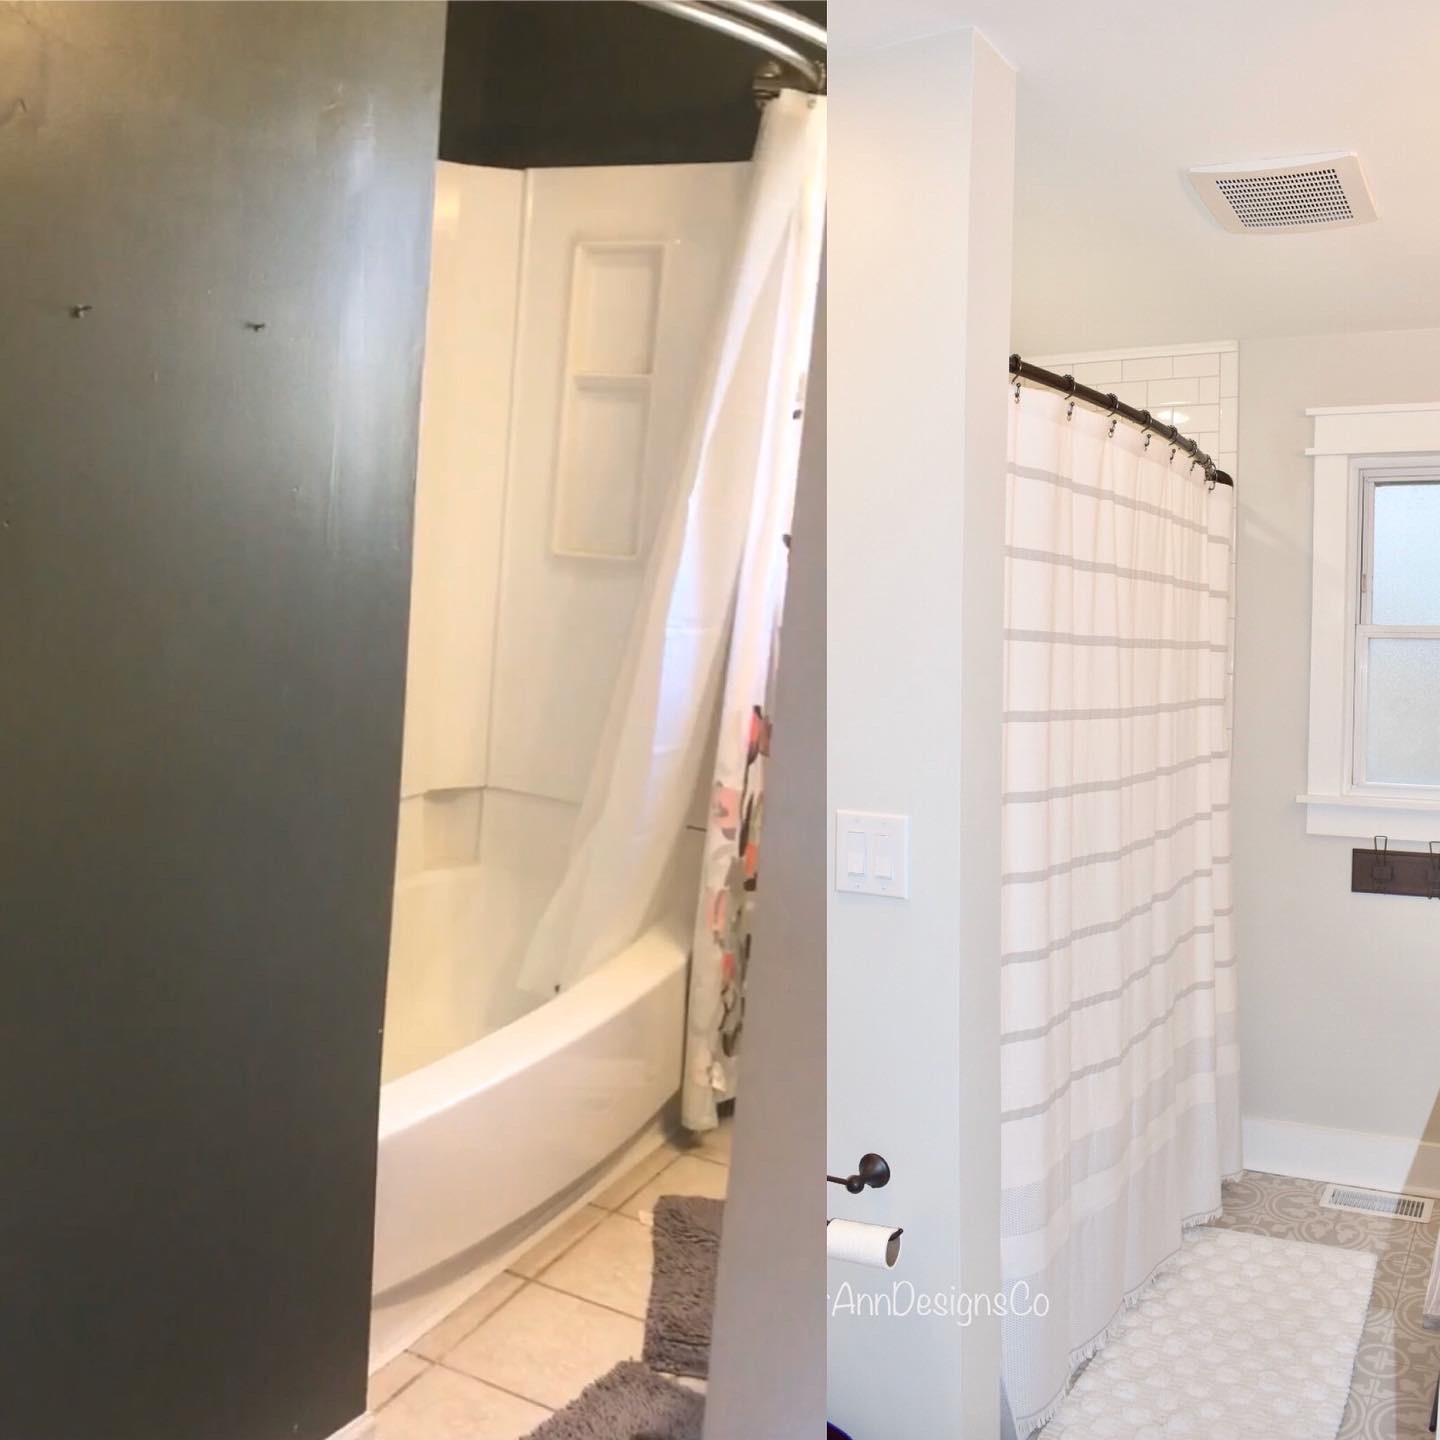
Yes, I am that crazy lady who lays my tile out on the floor at Lowes…you would be amazed at how that helps you with decisions! The tile is DELLA TORRE Annabelle Gray from Lowes. It is affordable and was very easy to install! I picked a simple white subway tile for the tub surround and begged the hubs to do a shower niche with tile from the floor- he did and it turned about AMAZING!!
The hubs is changing the trim on all the windows and doors in the house to this modern craftsman style trim. The shower curtain is from TJMaxx, the bath mat and towels are from Target, and the hooks under the window are from Hobby Lobby.
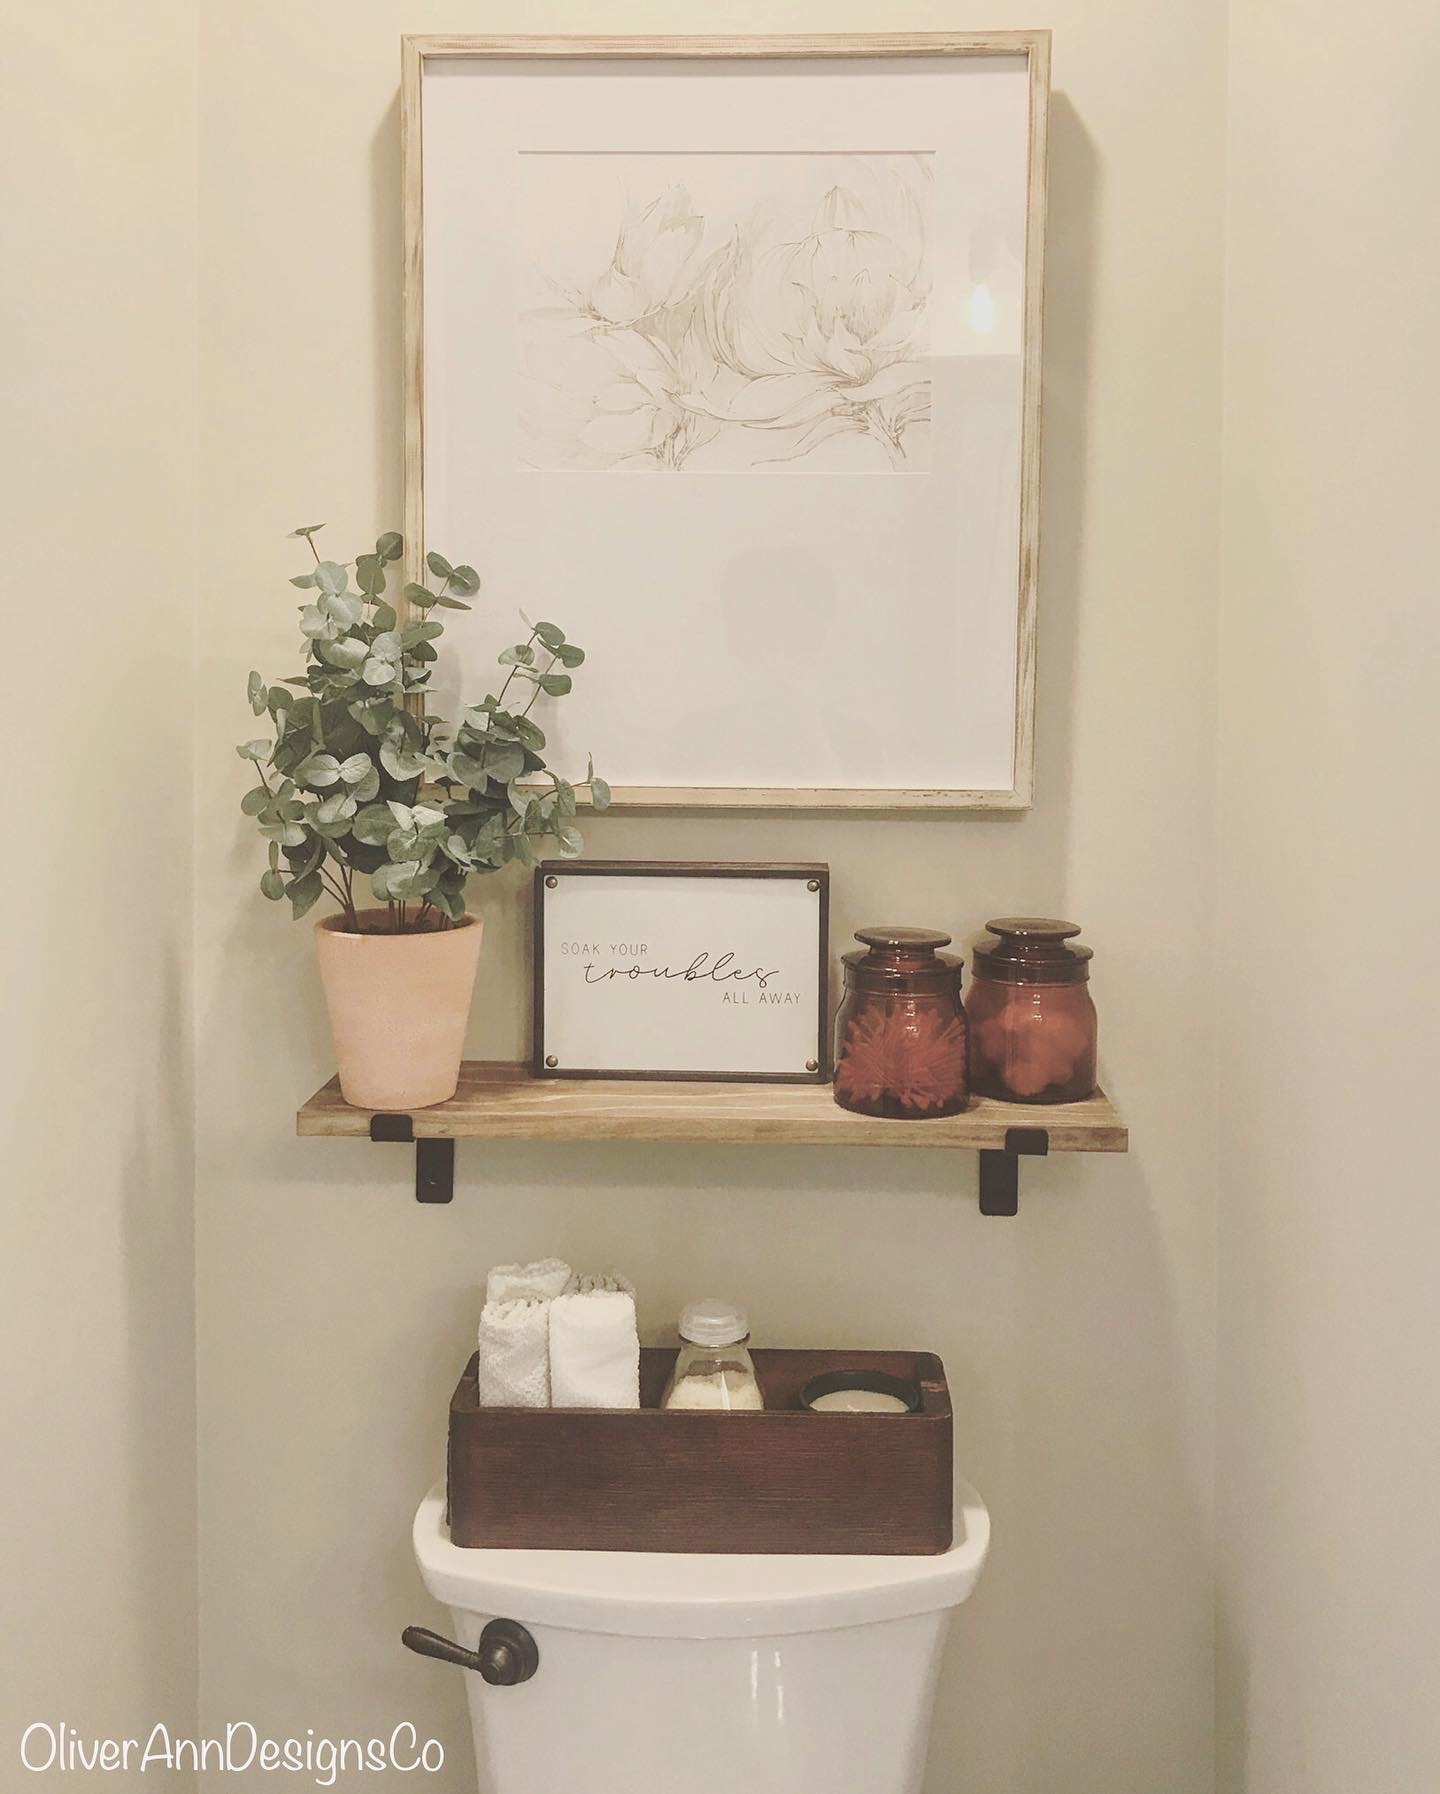
I wanted a little shelf over the toilet and wanted to keep it low profile so we used a 1×6 premium pine board with these brackets from Amazon. I finished the wood to match the vanity top. I love using old sewing machine drawers for storage, they are the perfect size to sit on the back of a toilet.
You don’t see this from the pictures but we put a pocket door in so that we didn’t lose space with a door opening into the bathroom. Pocket doors are really fantastic!
I think before and after pictures make a big impact because you can really see how much effort someone has put into a project.
The definition of renovate is to restore to a better state…I think we definitely did that for the bathroom reno of 2019. I hope you have enjoyed looking at these pictures. I still just stand in the doorway of this bathroom sometimes and am amazed at the transformation that took place!
Here are a few more links to some additional items:
**All photos were taken by me and are not to be used without permission**
**This post contains affiliate links from Amazon**
Disclosure
This blog is a personal blog written and edited by me. For questions about this blog, please contact oliveranndesignsco@gmail.com.
As an Amazon Associate, I earn from qualifying purchases.
This blog abides by word of mouth marketing standards. We believe in the honesty of relationships, opinions, and identity. The blog’s owners are not compensated to provide opinions on products, services, websites, and/or other topics. The views and opinions expressed on this blog are purely ours as the blog owner. If we claim or appear to be experts on certain topics, products, or service areas, we will only endorse products or services that we believe, based on our expertise, are worthy of such endorsement. Any product claim, statistic, quote or other representation about a product or service should always be verified with the manufacturer or provider.
This blog does not contain any content which might present a conflict of interest.
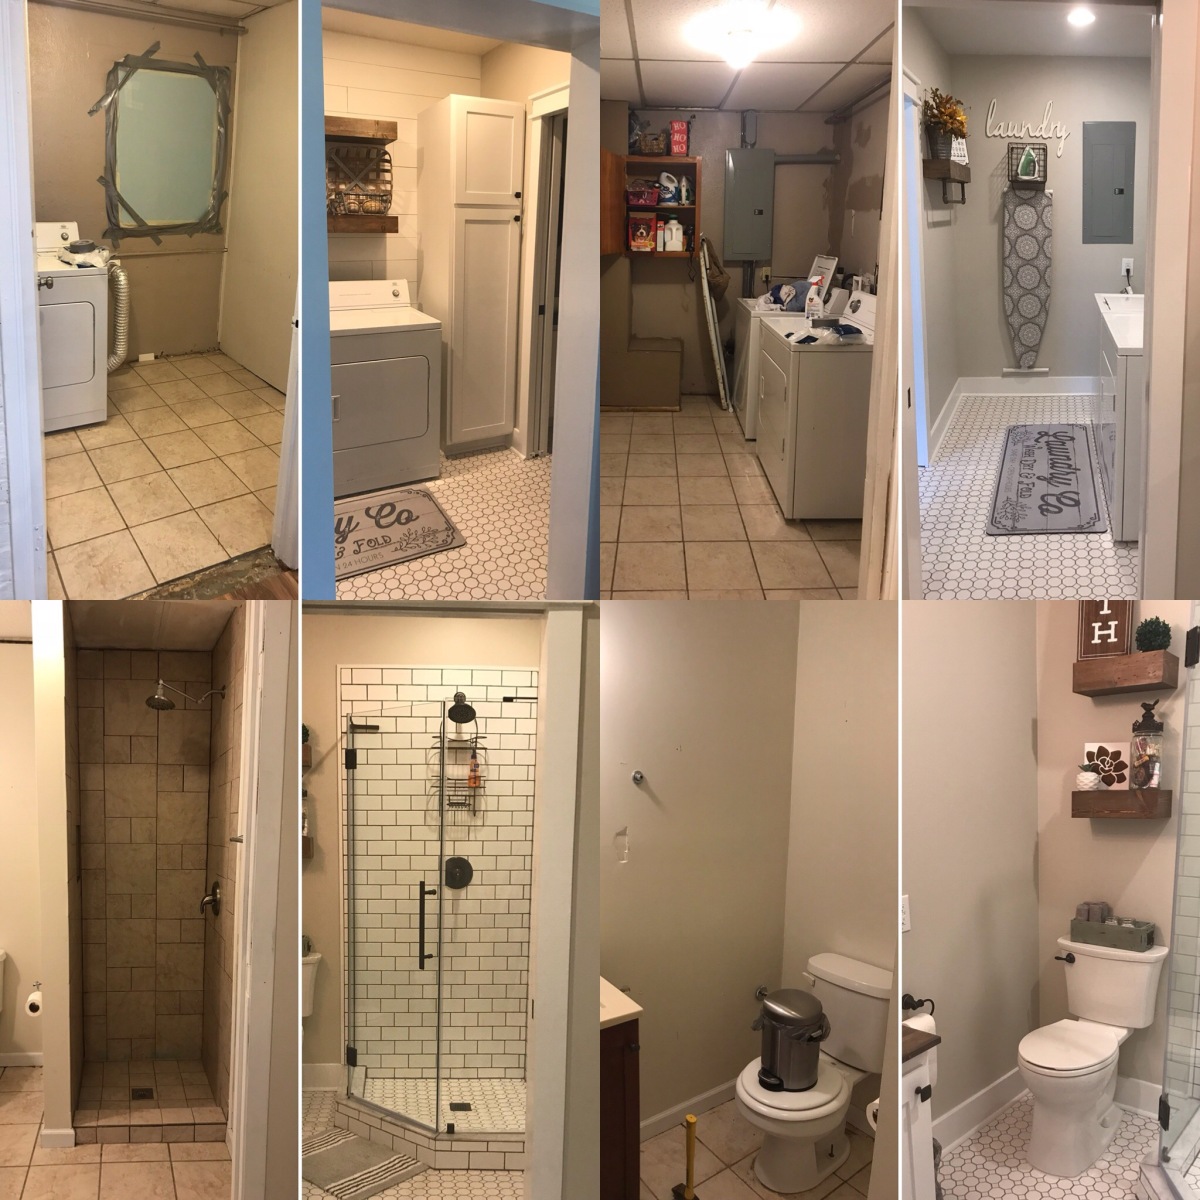
Before & after pictures of our bathroom/laundry room renovation as well the styles & products we utilized in the project.
Merriam-Webster Dictionary defines the word Renovate as follows: to restore to a better state (by cleaning, repairing, or rebuilding) &/or to restore to life or vigor.
I have mentioned before how we bought a 1960 brick rancher that needed some TLC. Y’all…a fixer upper is hard work especially when you don’t have a Shorty in your life like Chip & Joanna do 😉 We are doing most of the renovations ourselves during our days off & on the weekends.
The biggest project we did in 2018 as far as renovations go is our Bathroom/Laundry Room Reno. This wasn’t necessarily the first thing we were going to tackle in this house BUT we had a pipe burst & it forced our hand.
At some point the carport of this house was converted into a master with a laundry room/bathroom. While both rooms were a decent size, the design was not very functional. The laundry room had masonry walls so all of the plumbing was exposed. There was only one small storage cabinet & the door opened into the room taking up precious space. The bathroom- you enter it from the laundry room- did not have its own door. The shower was maybe 2.5 feet x 2.5 feet so if you dropped something, you had to step out of the shower to get it (we rarely used this shower because it was so small). This project was trying & frustrating, at times it felt like it would never end however the end results were so worth it!
Previously, I’ve shared a few DIY tutorials on several projects from our Bathroom/Laundry Room Reno but I’ve never shared pictures of the finished remodel or my thought process behind the designs we choose.
We woke up one morning last year in early January to water coming out from under the wall in the bathroom. Unlike the laundry room, the bathroom did have drywall. When we started opening up the wall to find the pipe that burst, we discovered that the masonry walls were never sealed properly & mold was EVERYWHERE. I maybe have sat down on the floor & cried at this point. We really were not planning on a complete gut job but now we had to. I will say I can see why Chip gets so excited about demo day, knocking down that tiny shower gave me GREAT pleasure!!
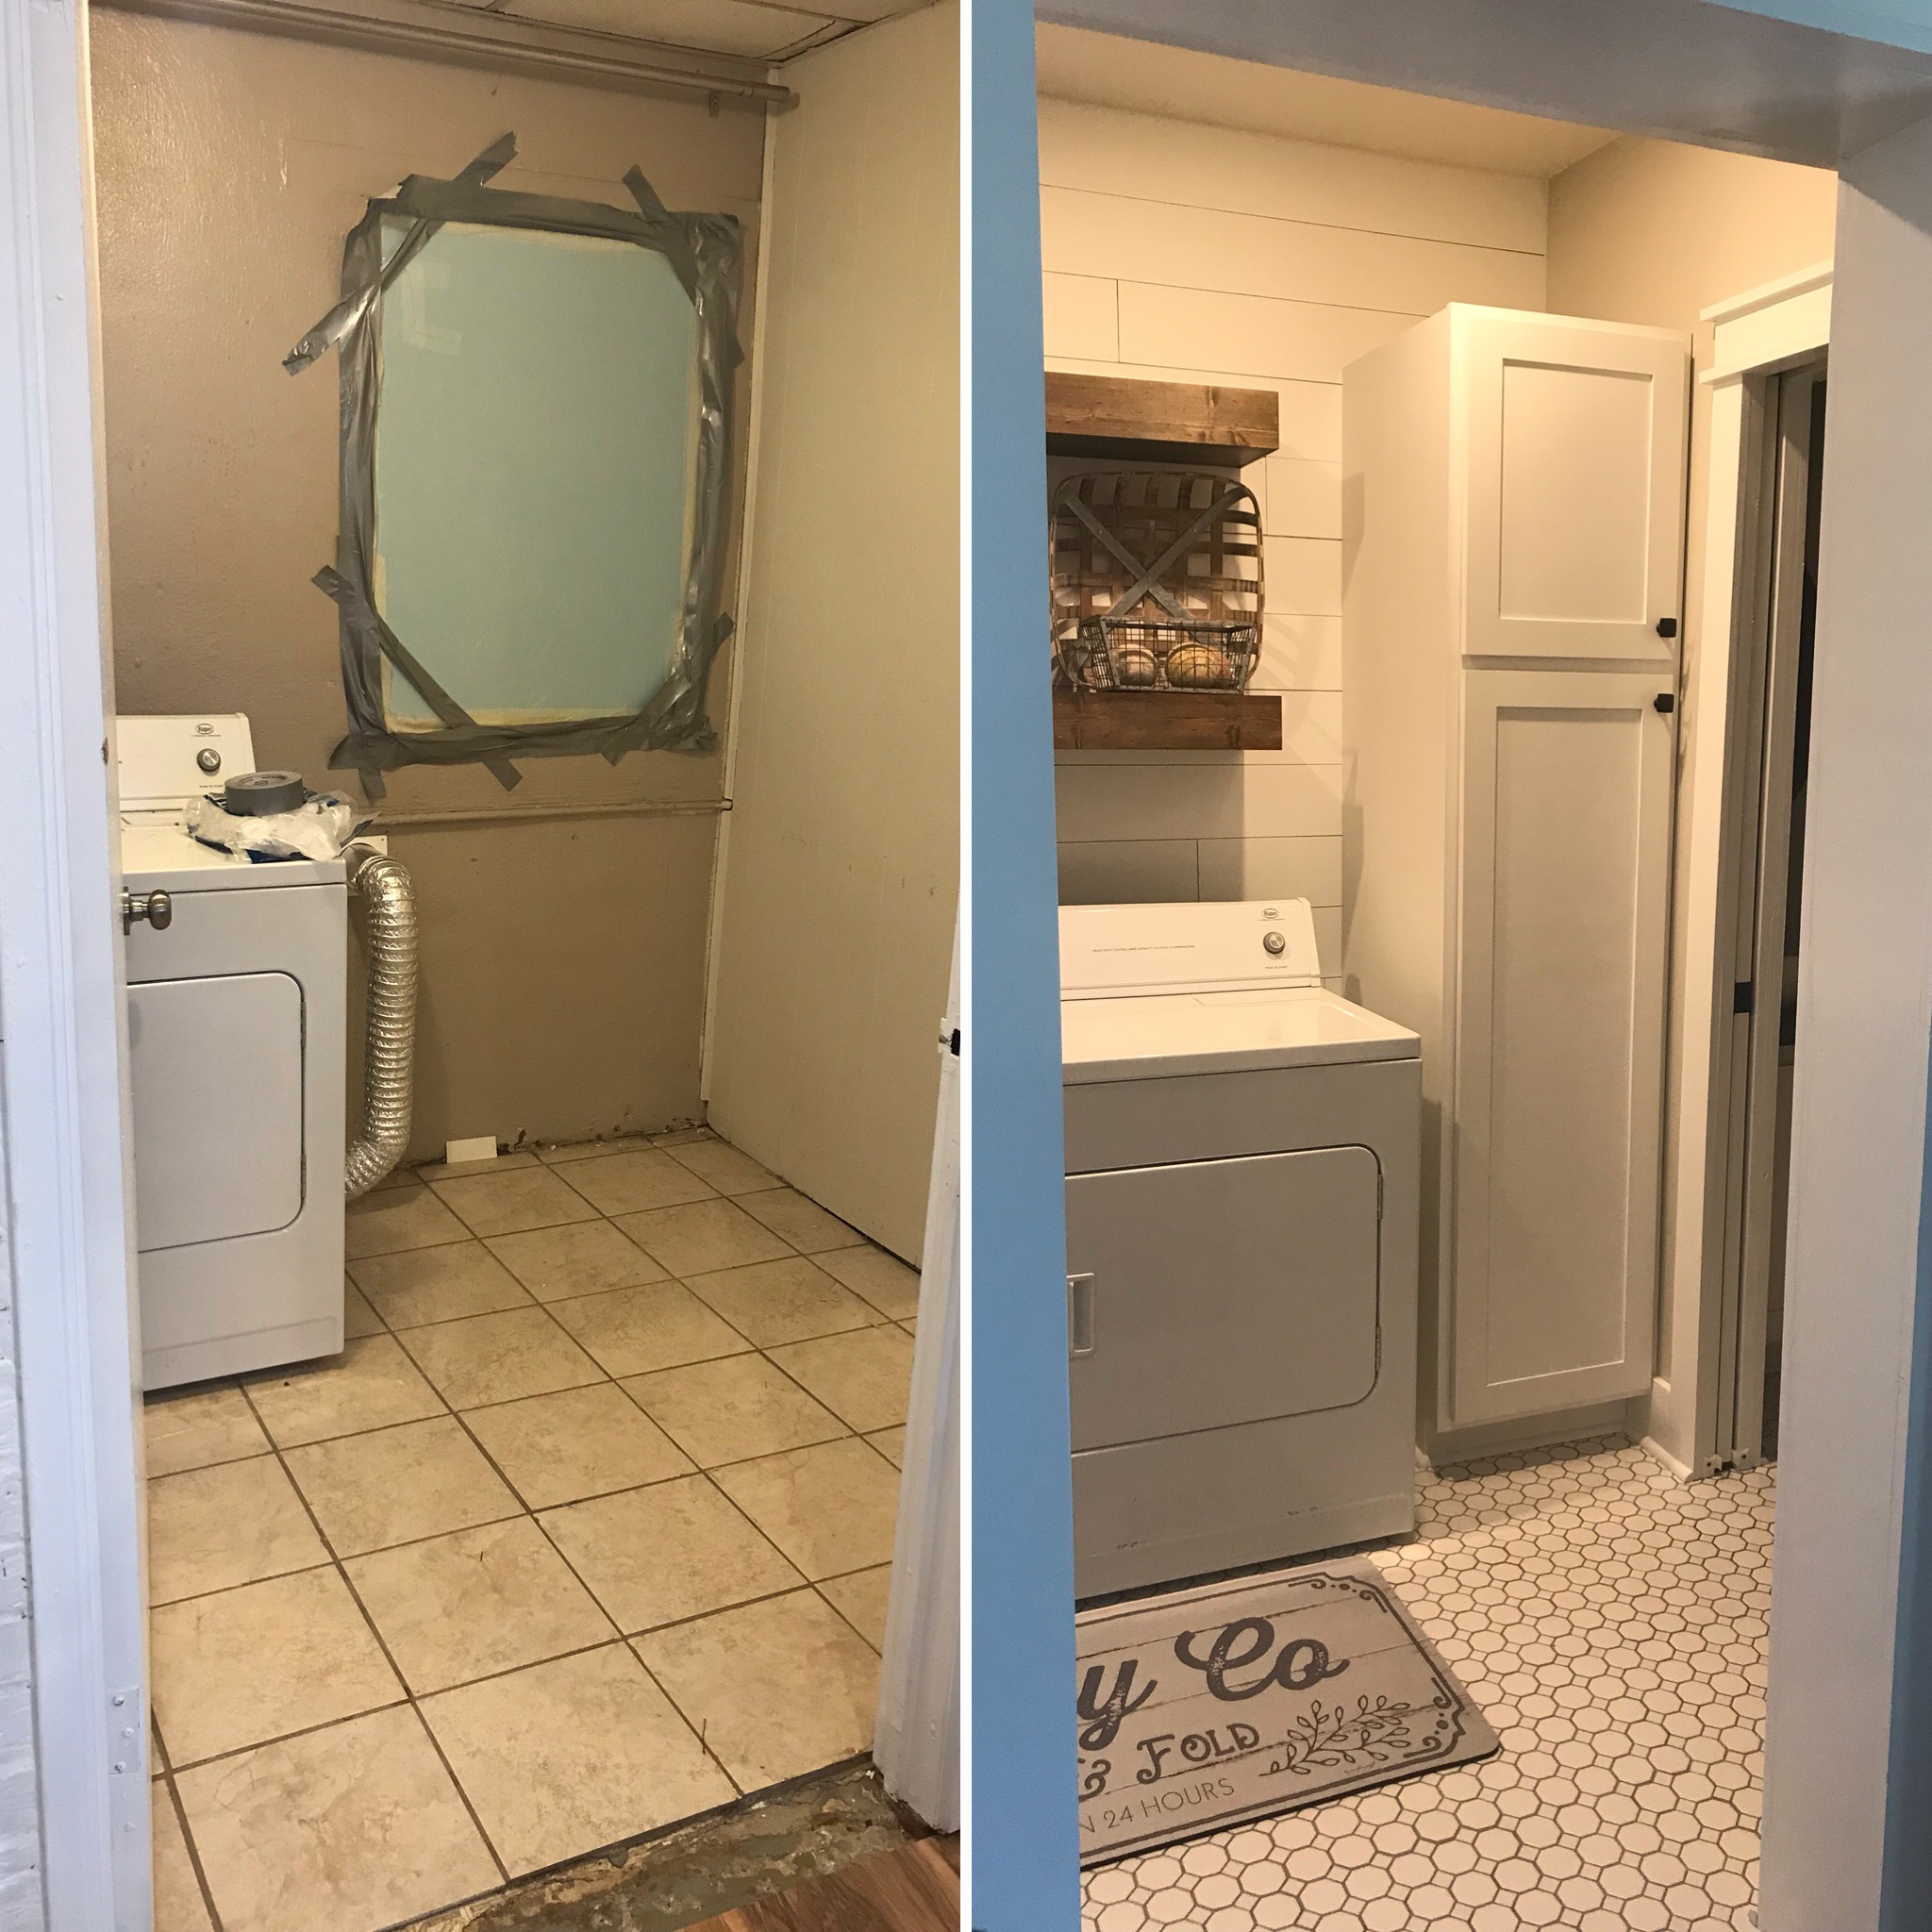
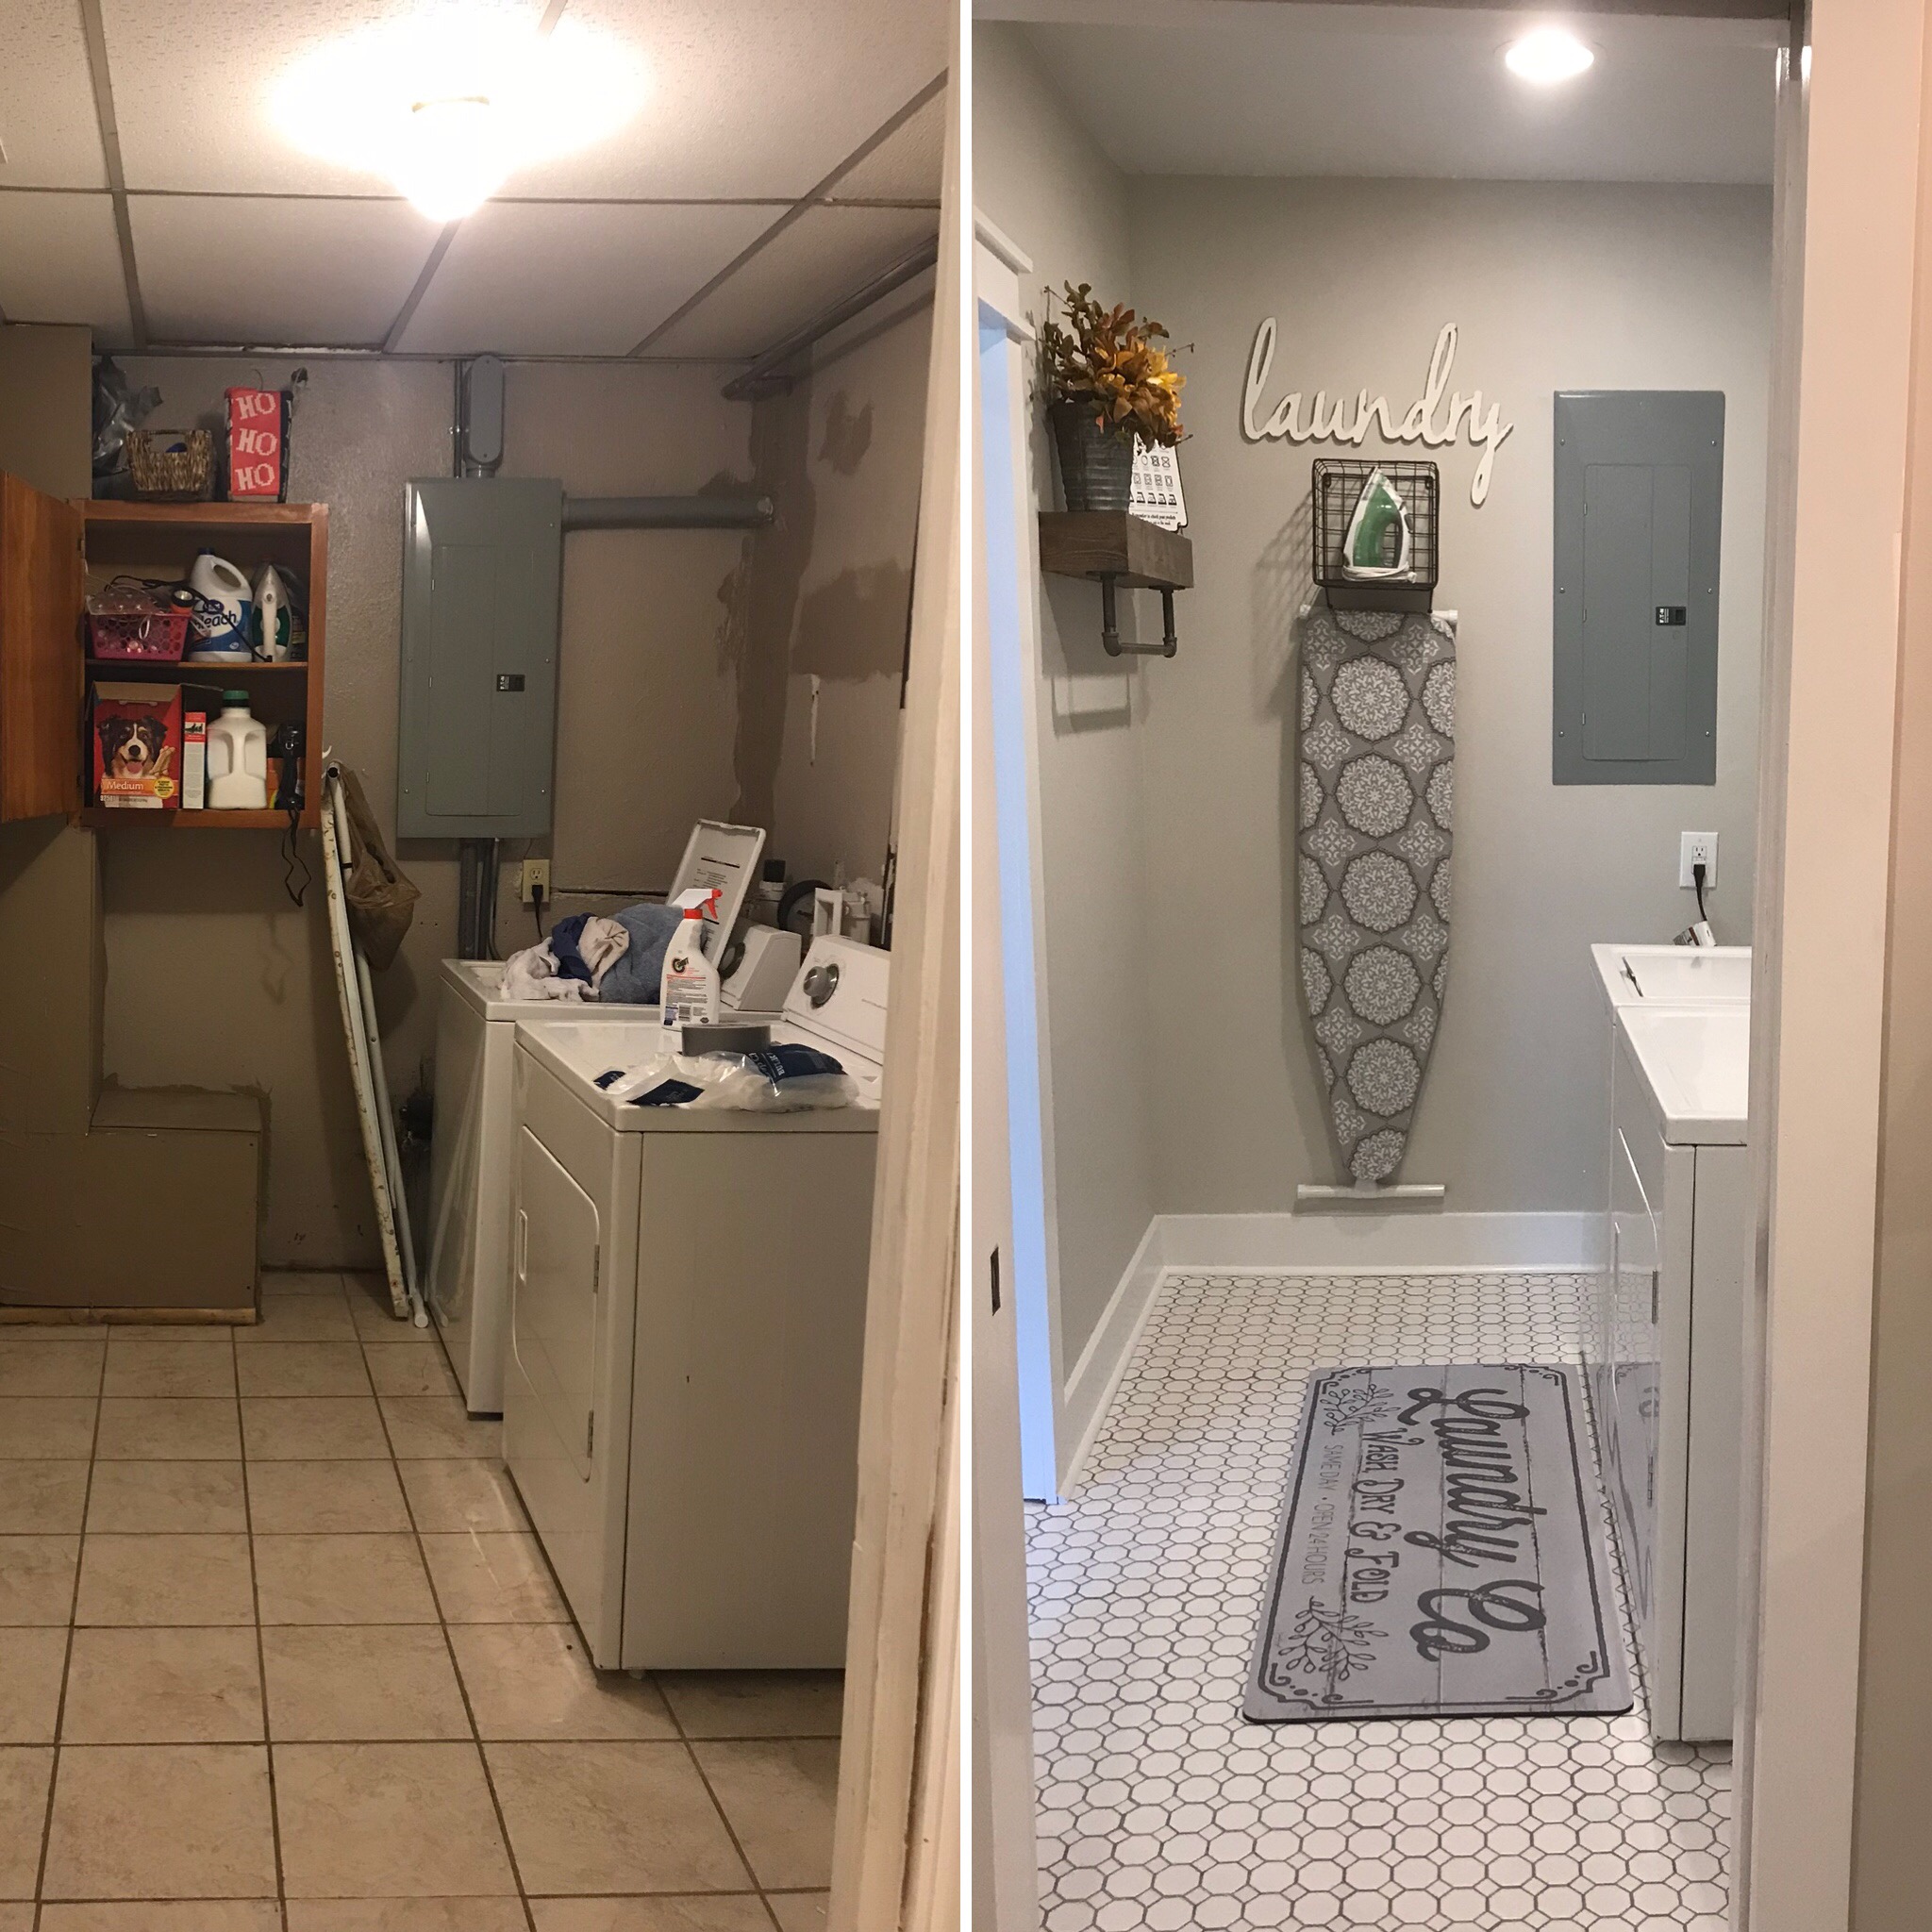
This is the view looking into the laundry room from the bedroom.
There was a nonfunctional louvre window that the prior owners had stuffed with insulation- when we moved in, the hubs covered it with foam insulation board. During the renovation process we bricked this window in- the exterior of the house needs a fresh coat of paint & bricking in this small window was very simple to do!
These rooms had a somewhat low drop ceiling with the individual ceiling tiles. We ended up getting rid of the drop ceiling which really helped the rooms seem bigger. We also framed the laundry room in so we could put drywall up in both rooms.
Storage was a necessity in this room so the hubs built me a tall shaker style cabinet & we built the floating shelves.
I think accent walls are a great way to add some character to a room. I wanted to incorporate shiplap somewhere in this remodel so I decided the accent wall would be a great way to do this. To save some money, we decided to do faux shiplap, it is very cost friendly, easy to do, & looks great. To find out how we did this, check out our tutorial.
The before & after view looking from the bathroom into the laundry room really shows the transformation of the room! In addition to framing in the room so that we could put drywall up, we also added recessed lighting to both this room & the bathroom.
The minute I saw this tile I knew it was exactly what I wanted for this renovation! I love the look & it came in 12×12 sheets which made it easy to install.
Craftsman style trim is one of my favorite looks, it spruces a room up without being over the top! We used 1×6 pine boards for our baseboards with 1×4 & 1×2 pine boards for the door trim. We will be continuing this look throughout the house as we do our renos/facelifts.
I wanted a place where I could hang clothes as we took them out of the dryer so we put another floating shelf with a black pipe hanging rack opposite of the washer.
I looked for the perfect mat/rug for a while, I wanted something durable but something that also went with my decor in the room. I stumbled across this floor mat & knew it was perfect! The colors go great with the grout we used on the tile & the design ties in with the shiplap behind the washer & dryer.
Displaying my iron & ironing board left me with more space in my cabinet. There are a lot of options out there for this but I happened upon this basket with hooks at Hobby Lobby one day & knew it would go perfect in the room! The hubs cut me a small piece of 1/4in plywood to put in the bottom of the basket so that the iron would not tip over. I finished the plywood to match the floating shelves.
Agreeable Grey by Sherwin Williams is the wall colors in both rooms- it is available at either the Sherwin Williams Store or Lowes from the HGTV by Sherwin Williams Collection. It is a great grey/beige color!
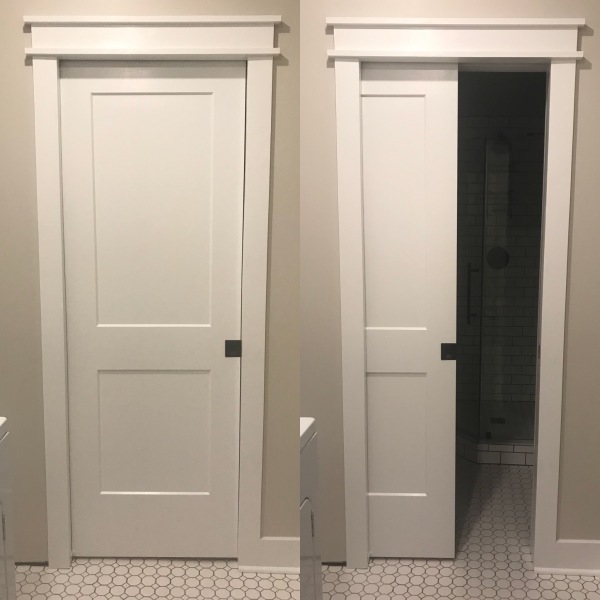
When we moved in, the bathroom did not have its own door & the door to the laundry room did not stay latched. I wanted this bathroom to actually feel like its own room & not just an extension off of the laundry room. From the get go, I told Neil we needed a pocket door here! I love pocket doors, it may be because my Grandmother & Granddaddy’s house had a few & they are sentimental but they also are a great option when you can’t afford to have the swing of the door taking up space in a room. It was actually really easy to do. We had to open up the wall anyway when we found the mold so it made it easy to put the pocket door kit in. We got our pocket door kit from Lowes. As we are renovating or giving each room a facelift, we are installing new interior doors. I decided to go with the two panel shaker style doors. We also ordered these from Lowes.
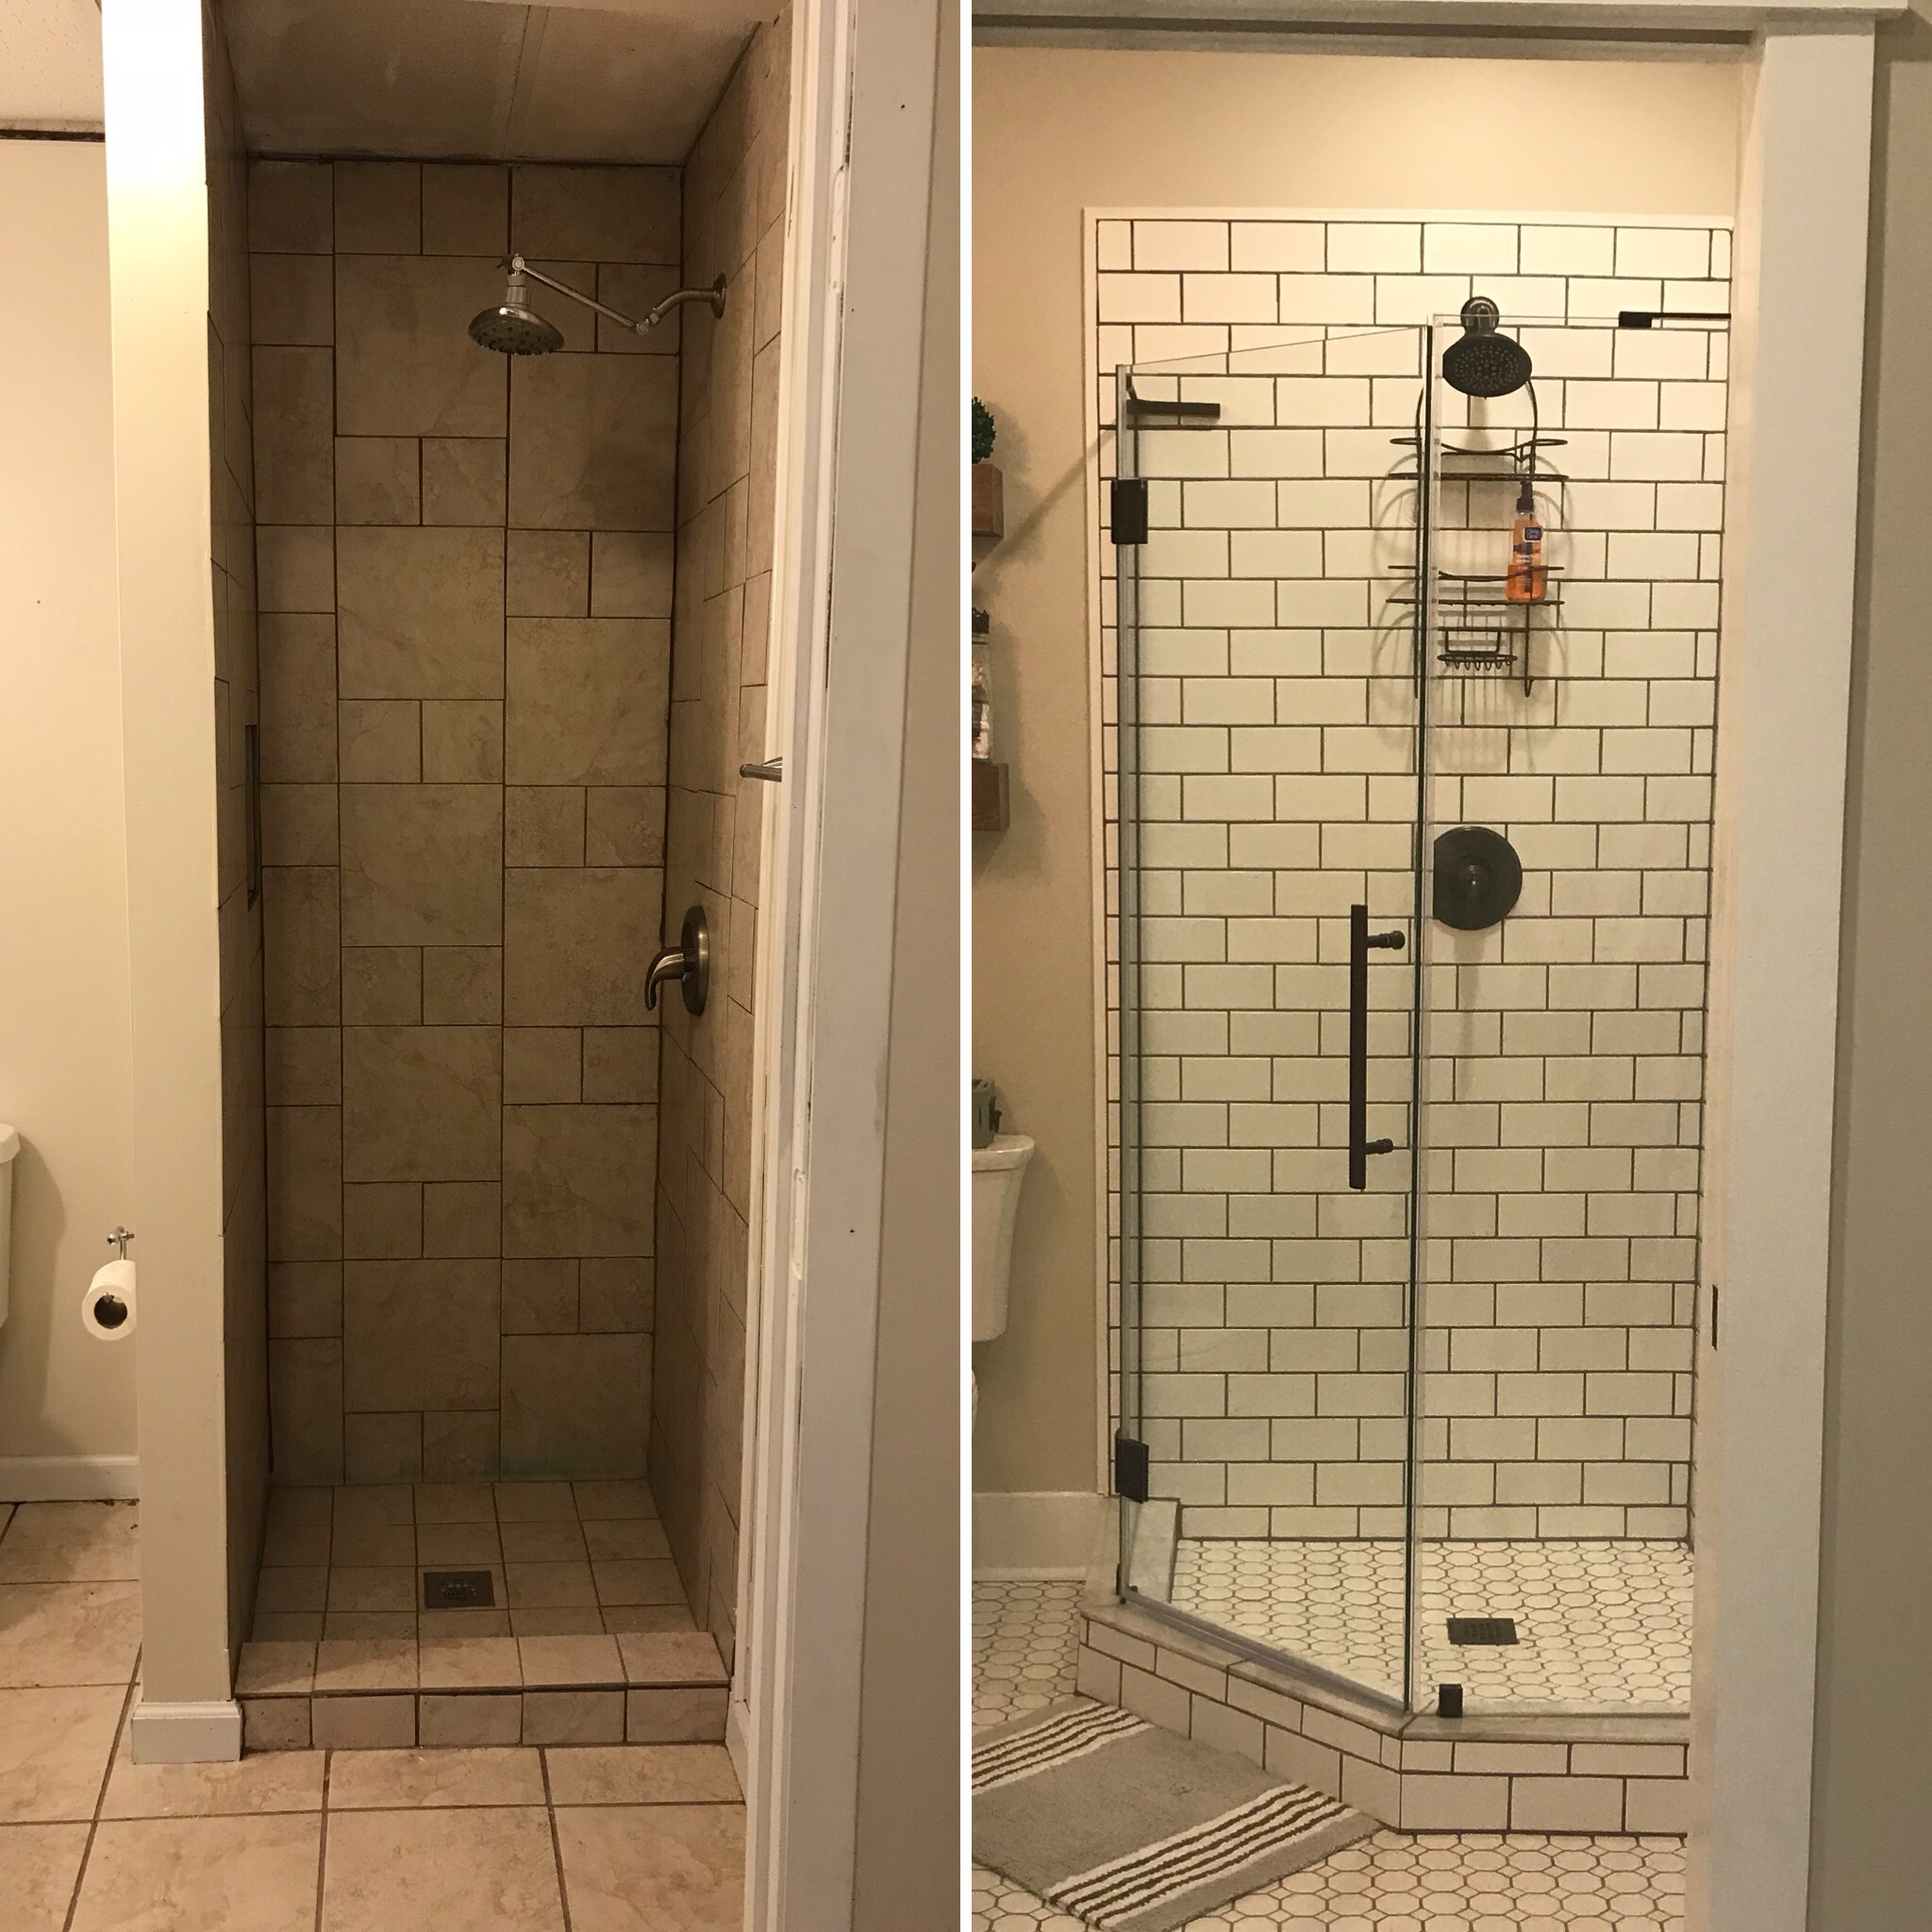
This is another instance where the before & after really shows the transformation of the space! Here is that tiny shower I told you about earlier. It was small, dim (no lighting in the shower), & just not very functional. To utilize the space to its greatest potential we decided to go with a corner shower with a full glass enclosure. We used marble for the top of the curb, the shower floor tile is the same tile we used on the floor, & the walls are subway tile.
I’m using oil rubbed bronze for the fixtures & door knobs in this house, I think that it contrasts really well with the other color palettes I’m using throughout the house. I’m really pleased with how this turned out, not only does it look 100% better but it is now big enough that you can actually shower without feeling claustrophobic (hallelujah)!!
New toilet & floating shelves
We built our own vanity for this bathroom, also a shaker style. You can find the tutorial for how we built it here.
This picture is prior to the baseboards going down.
I finished the vanity top in the Restoration Hardware Style Finish which matches the floating shelves in both rooms. You can find my video tutorial on how to achieve this look here. It is an easy way to give wood a great look!
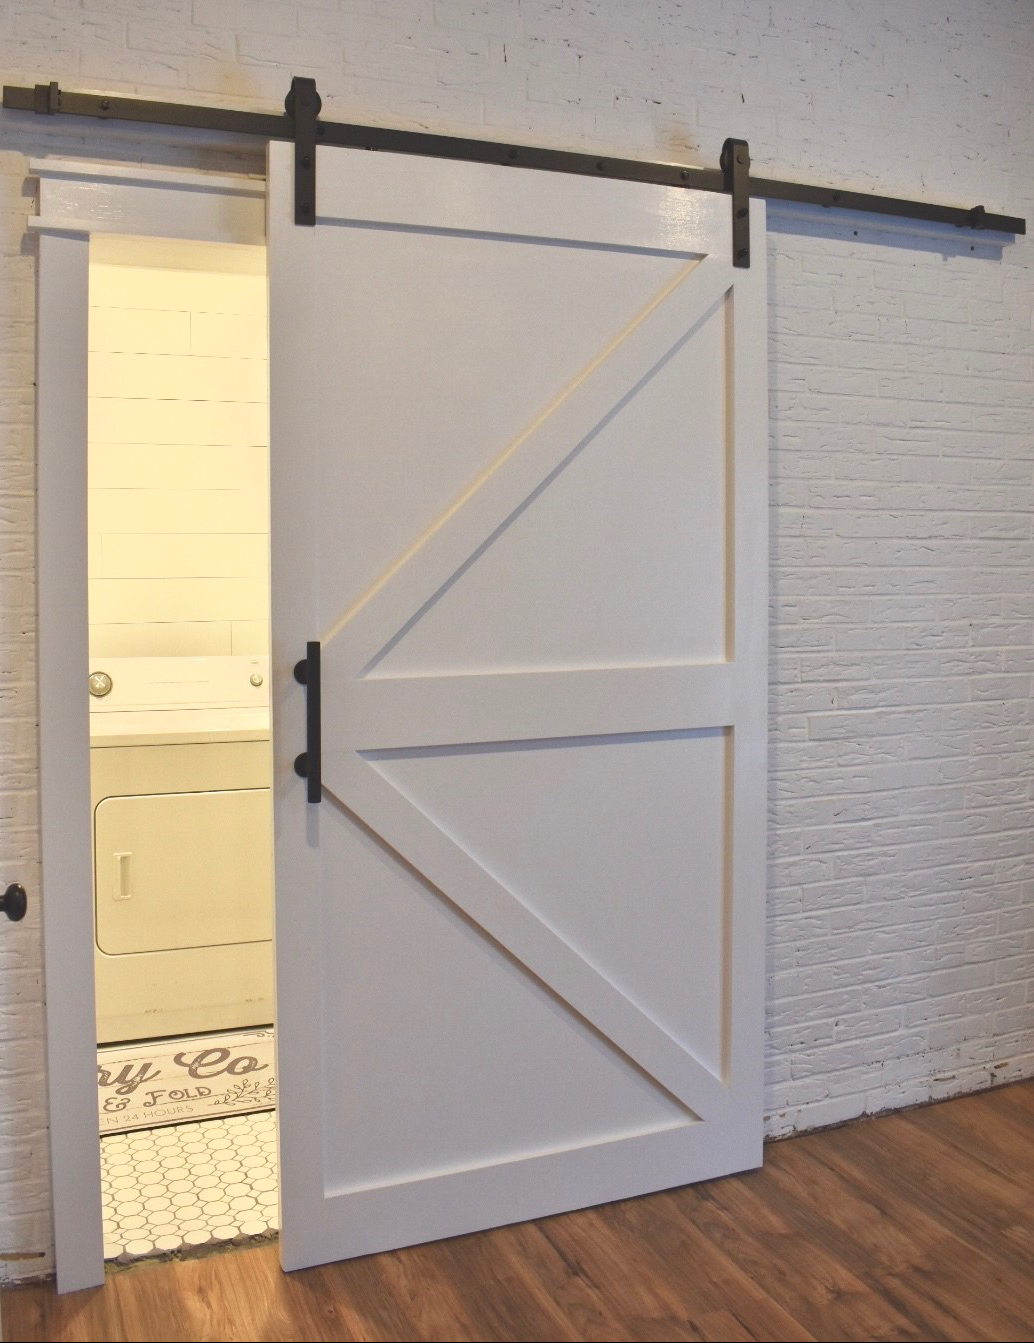
A British Brace Style Barn Door serves as the door for the laundry room. Unfortunately, because the walls to this room are all masonry we could not put a pocket door here so the next best option in my opinion is a barn door! It does not take up precious space in your room & for us it gave the brick wall some more character. We built the barn door ourselves- it was so easy to do & looks great! I also have a tutorial about how we built this door.
This is the biggest project that Neil & I have ever undergone together…sometimes we were at each others throats, at times I just wanted to sit down & cry or put the house on the market but in the end it was all worth it! We now have a laundry room & bathroom that looks great & therefore makes it enjoyable to use these spaces!
To see the whole space & how I decorated it take a peek at my video tour.
Shopping tips/products we used:
We shop at Lowes for most of what we need as far as wood, tile, etc, because the hubs get a military discount there. However, I ALWAYS browse the internet before I decide on something to make sure I am getting the best bang for my buck.
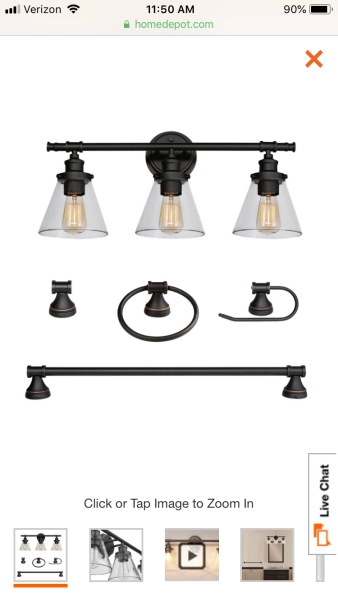
Vanity Light
I found this five piece bathroom light set from Home Depot- the look was exactly what I was going for & it is only about $75. It wasn’t sold in my local stores but I was able to order it with free shipping. You can find this product here. Don’t be fooled by the price, this not only looks really nice but the quality is also great in my opinion!
The mirror above the vanity is from Kirklands, it was only $35 & I used a coupon when I purchased it!
Amazon is also a great place to get items you need for your renovations. I actually utilized Amazon for a lot of the products we used!
Vessel Sink (this one is similar to the one I bought from Amazon)- you’ll save about $30 compared to your local home improvement store.
Waterfall Faucet -this looks so fantastic with the vessel sink & Restoration Hardware Style Vanity Top. You will save a ton ordering this faucet from Amazon compared to a home improvement store.
Barn Door Track – if you are installing a barn door, check Amazon before you buy your track at a local store. You will save a ton of money & in our opinion this brand track is better quality than the ones at our local stores.
**the above Amazon links are Amazon Affiliate Links.
One of the things I am going to focus on this year is sharing how I create a welcoming home space on budget.
Over the weekend I started taking down our Christmas decor & I decided I wanted to do a little winter theme for my mantle. I was able to repurpose quite a few things that I used for my Christmas decor but I one gaping stop that needed to be filled.
I had lucked up & found some cute Hearth & Hand with Magnolia products from Target after Christmas for 75% off. One of the things I found was an antler print in a black frame for about $4.50 that goes great with the deer I left up from my Christmas decor.
A lot of stores do not offer much as far as winter decor goes & I didn’t want to spend a lot of money on something that will just be up for a month or two. I had a pack of the value canvases that you get from Hobby Lobby or Michaels in my craft room so I decided to make a reverse canvas ‘faux’ hand lettered print with a winter phrase on it. Side note- my handwriting is terrible (I blame nursing but really its always been kinda bad), I did get some hand lettering books for Christmas- maybe they will help…lol.
I decided to do a tutorial on how I made this sign & I thought I would share it with y’all as my first DIY tutorial of the new year!
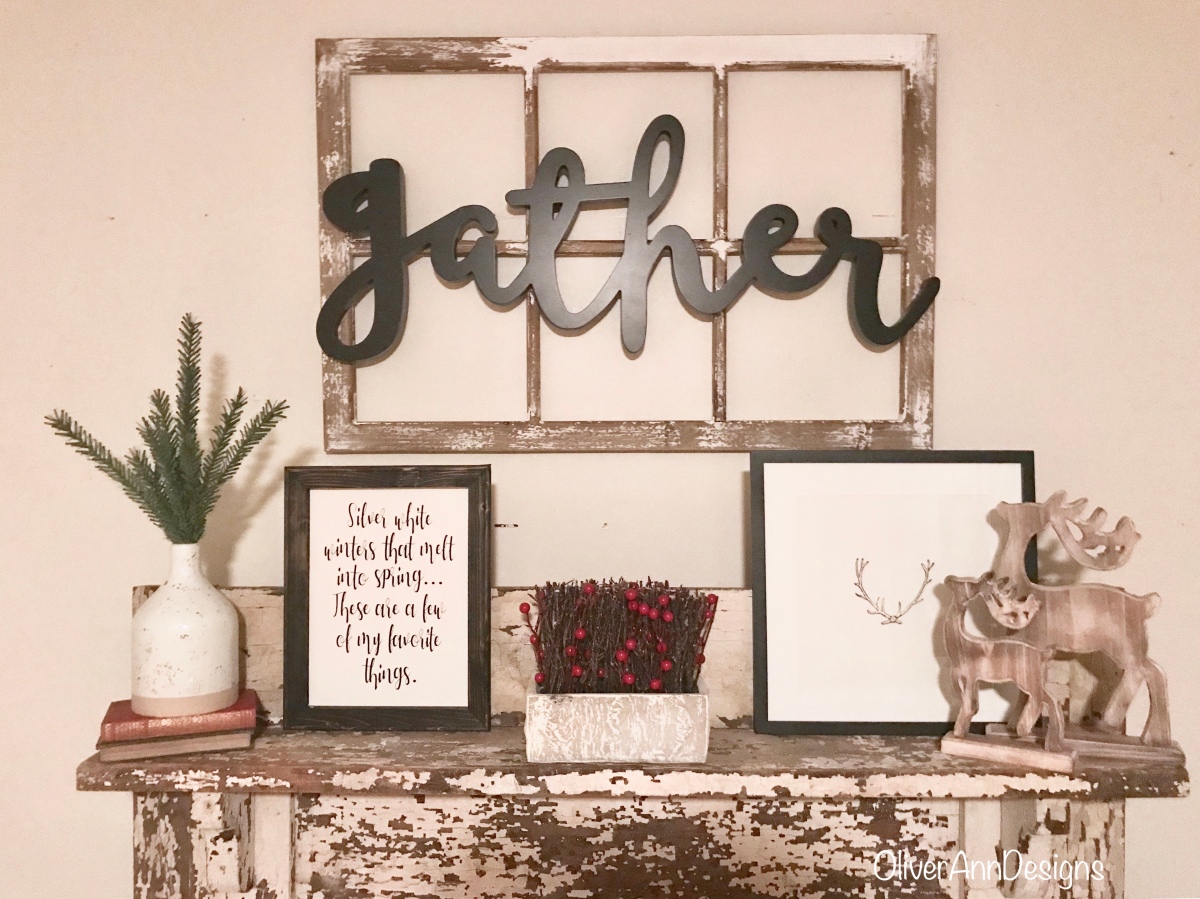
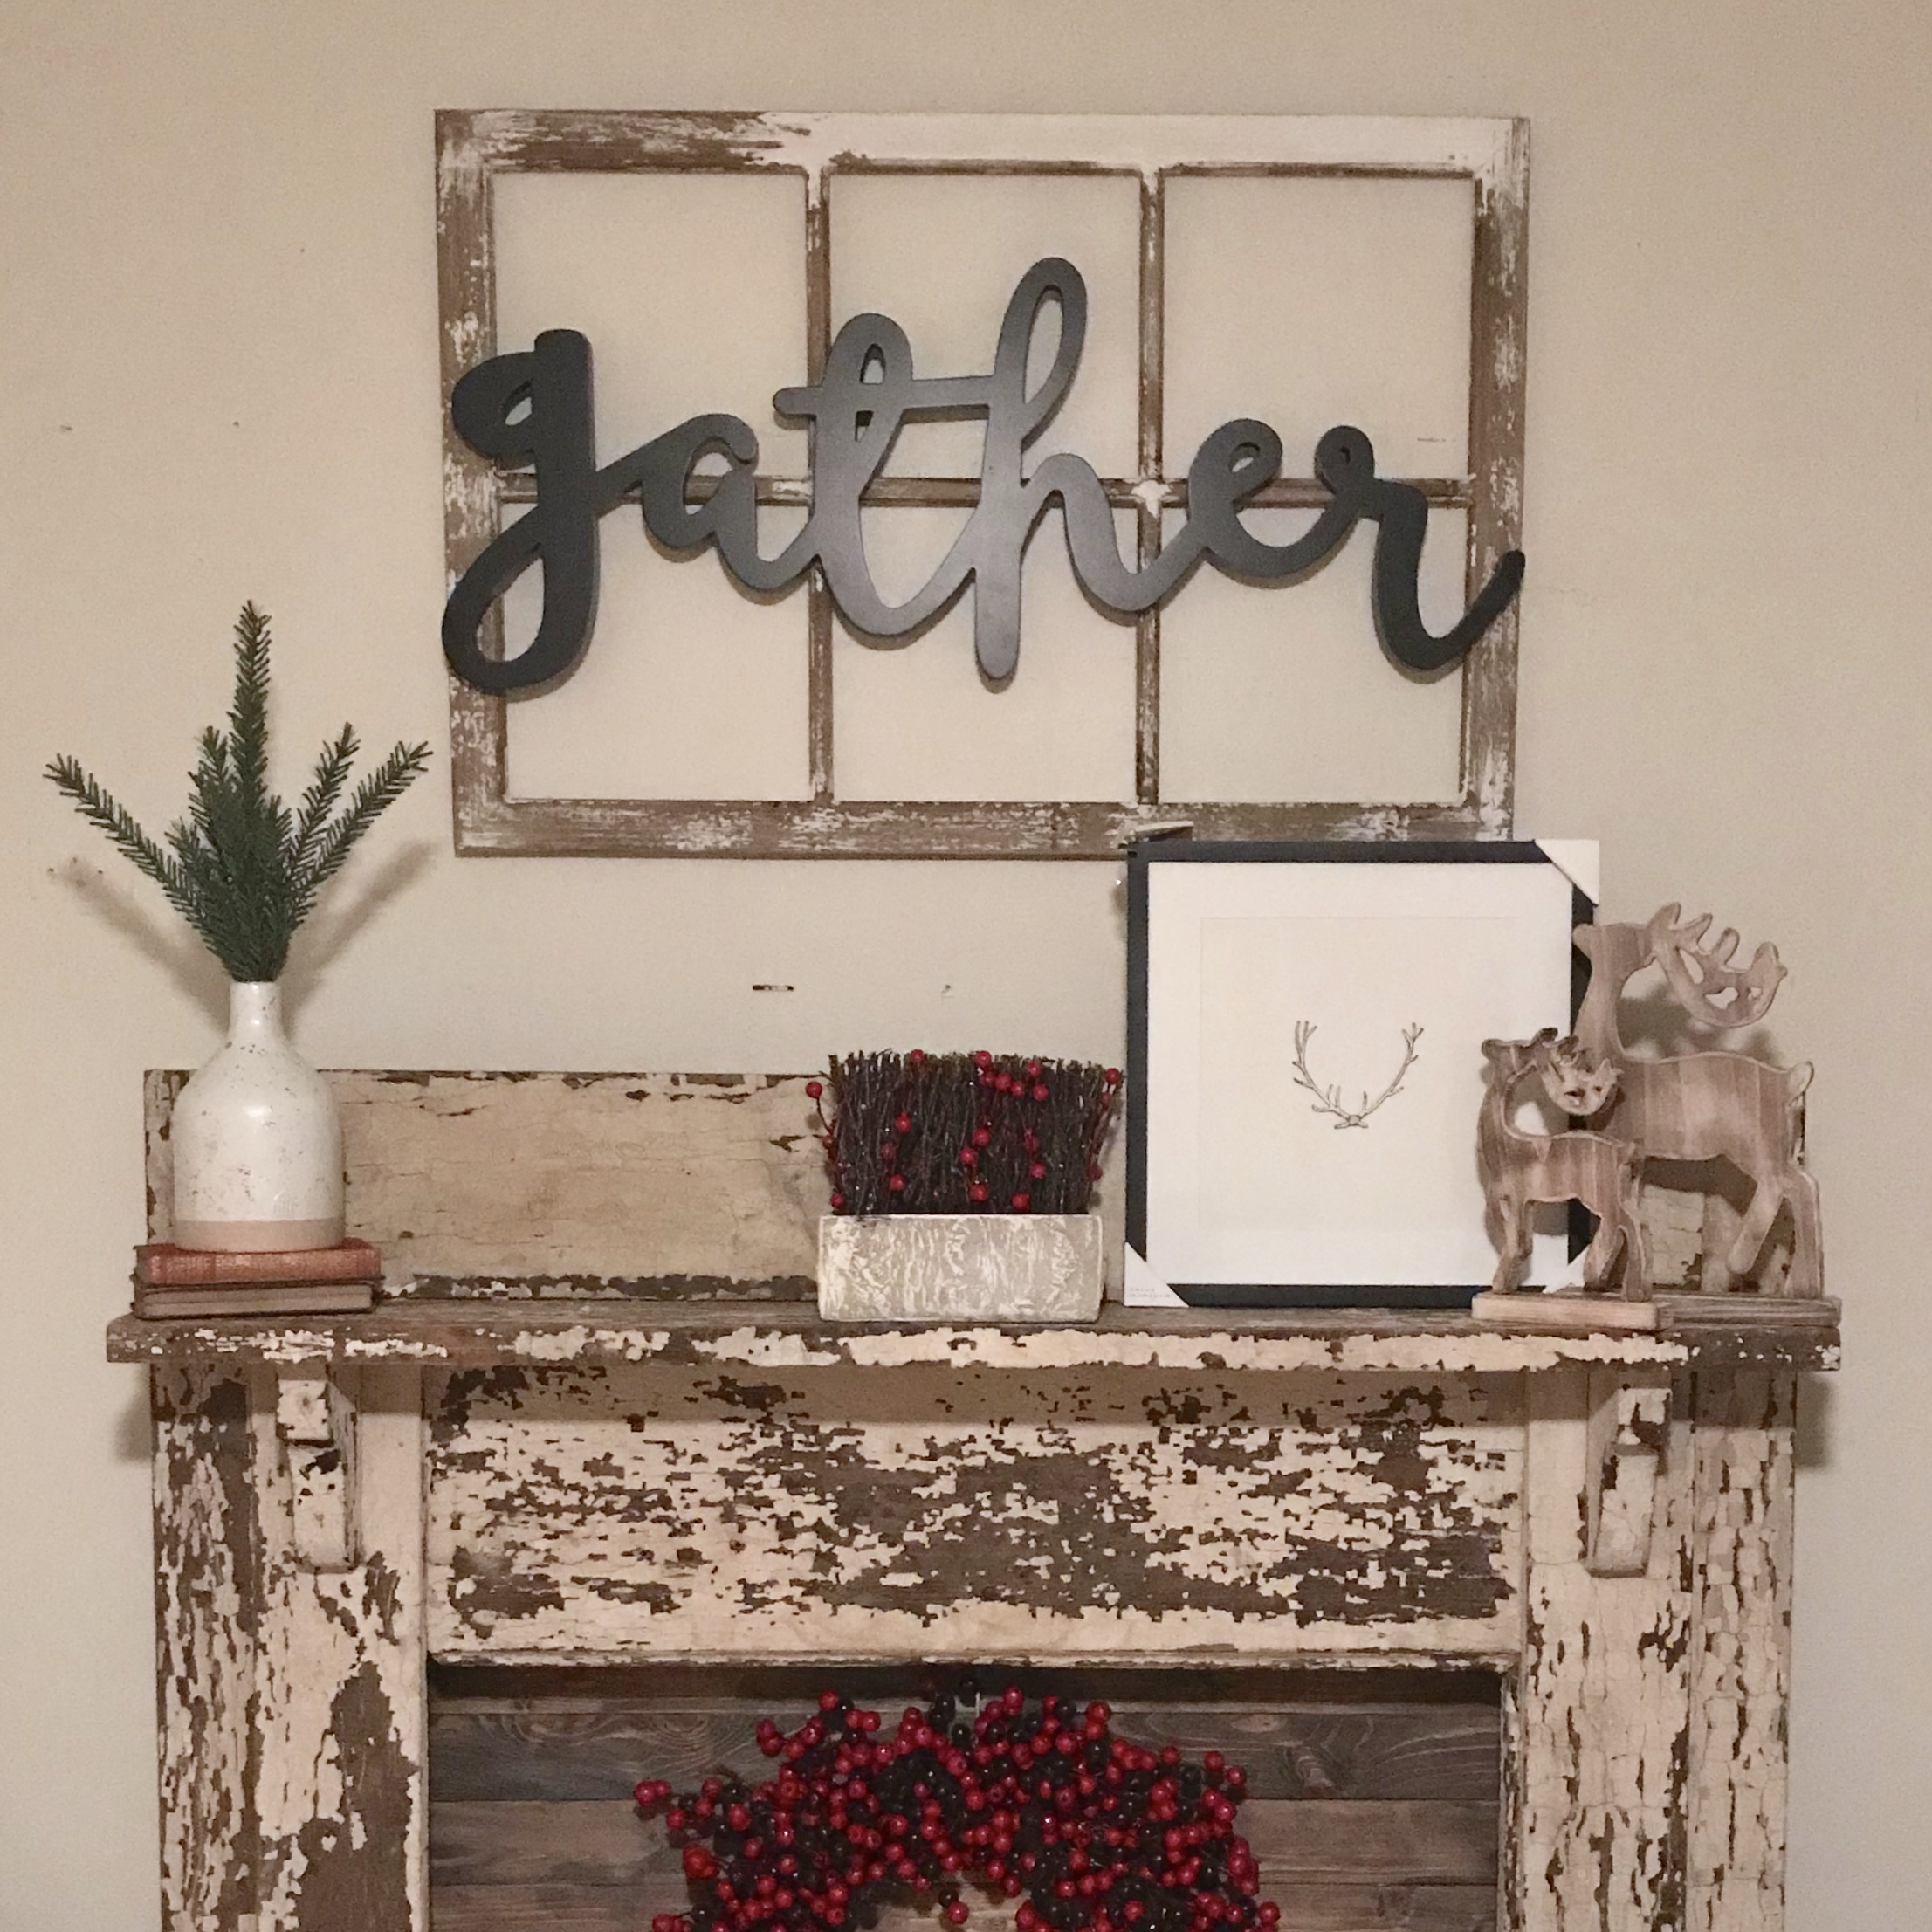
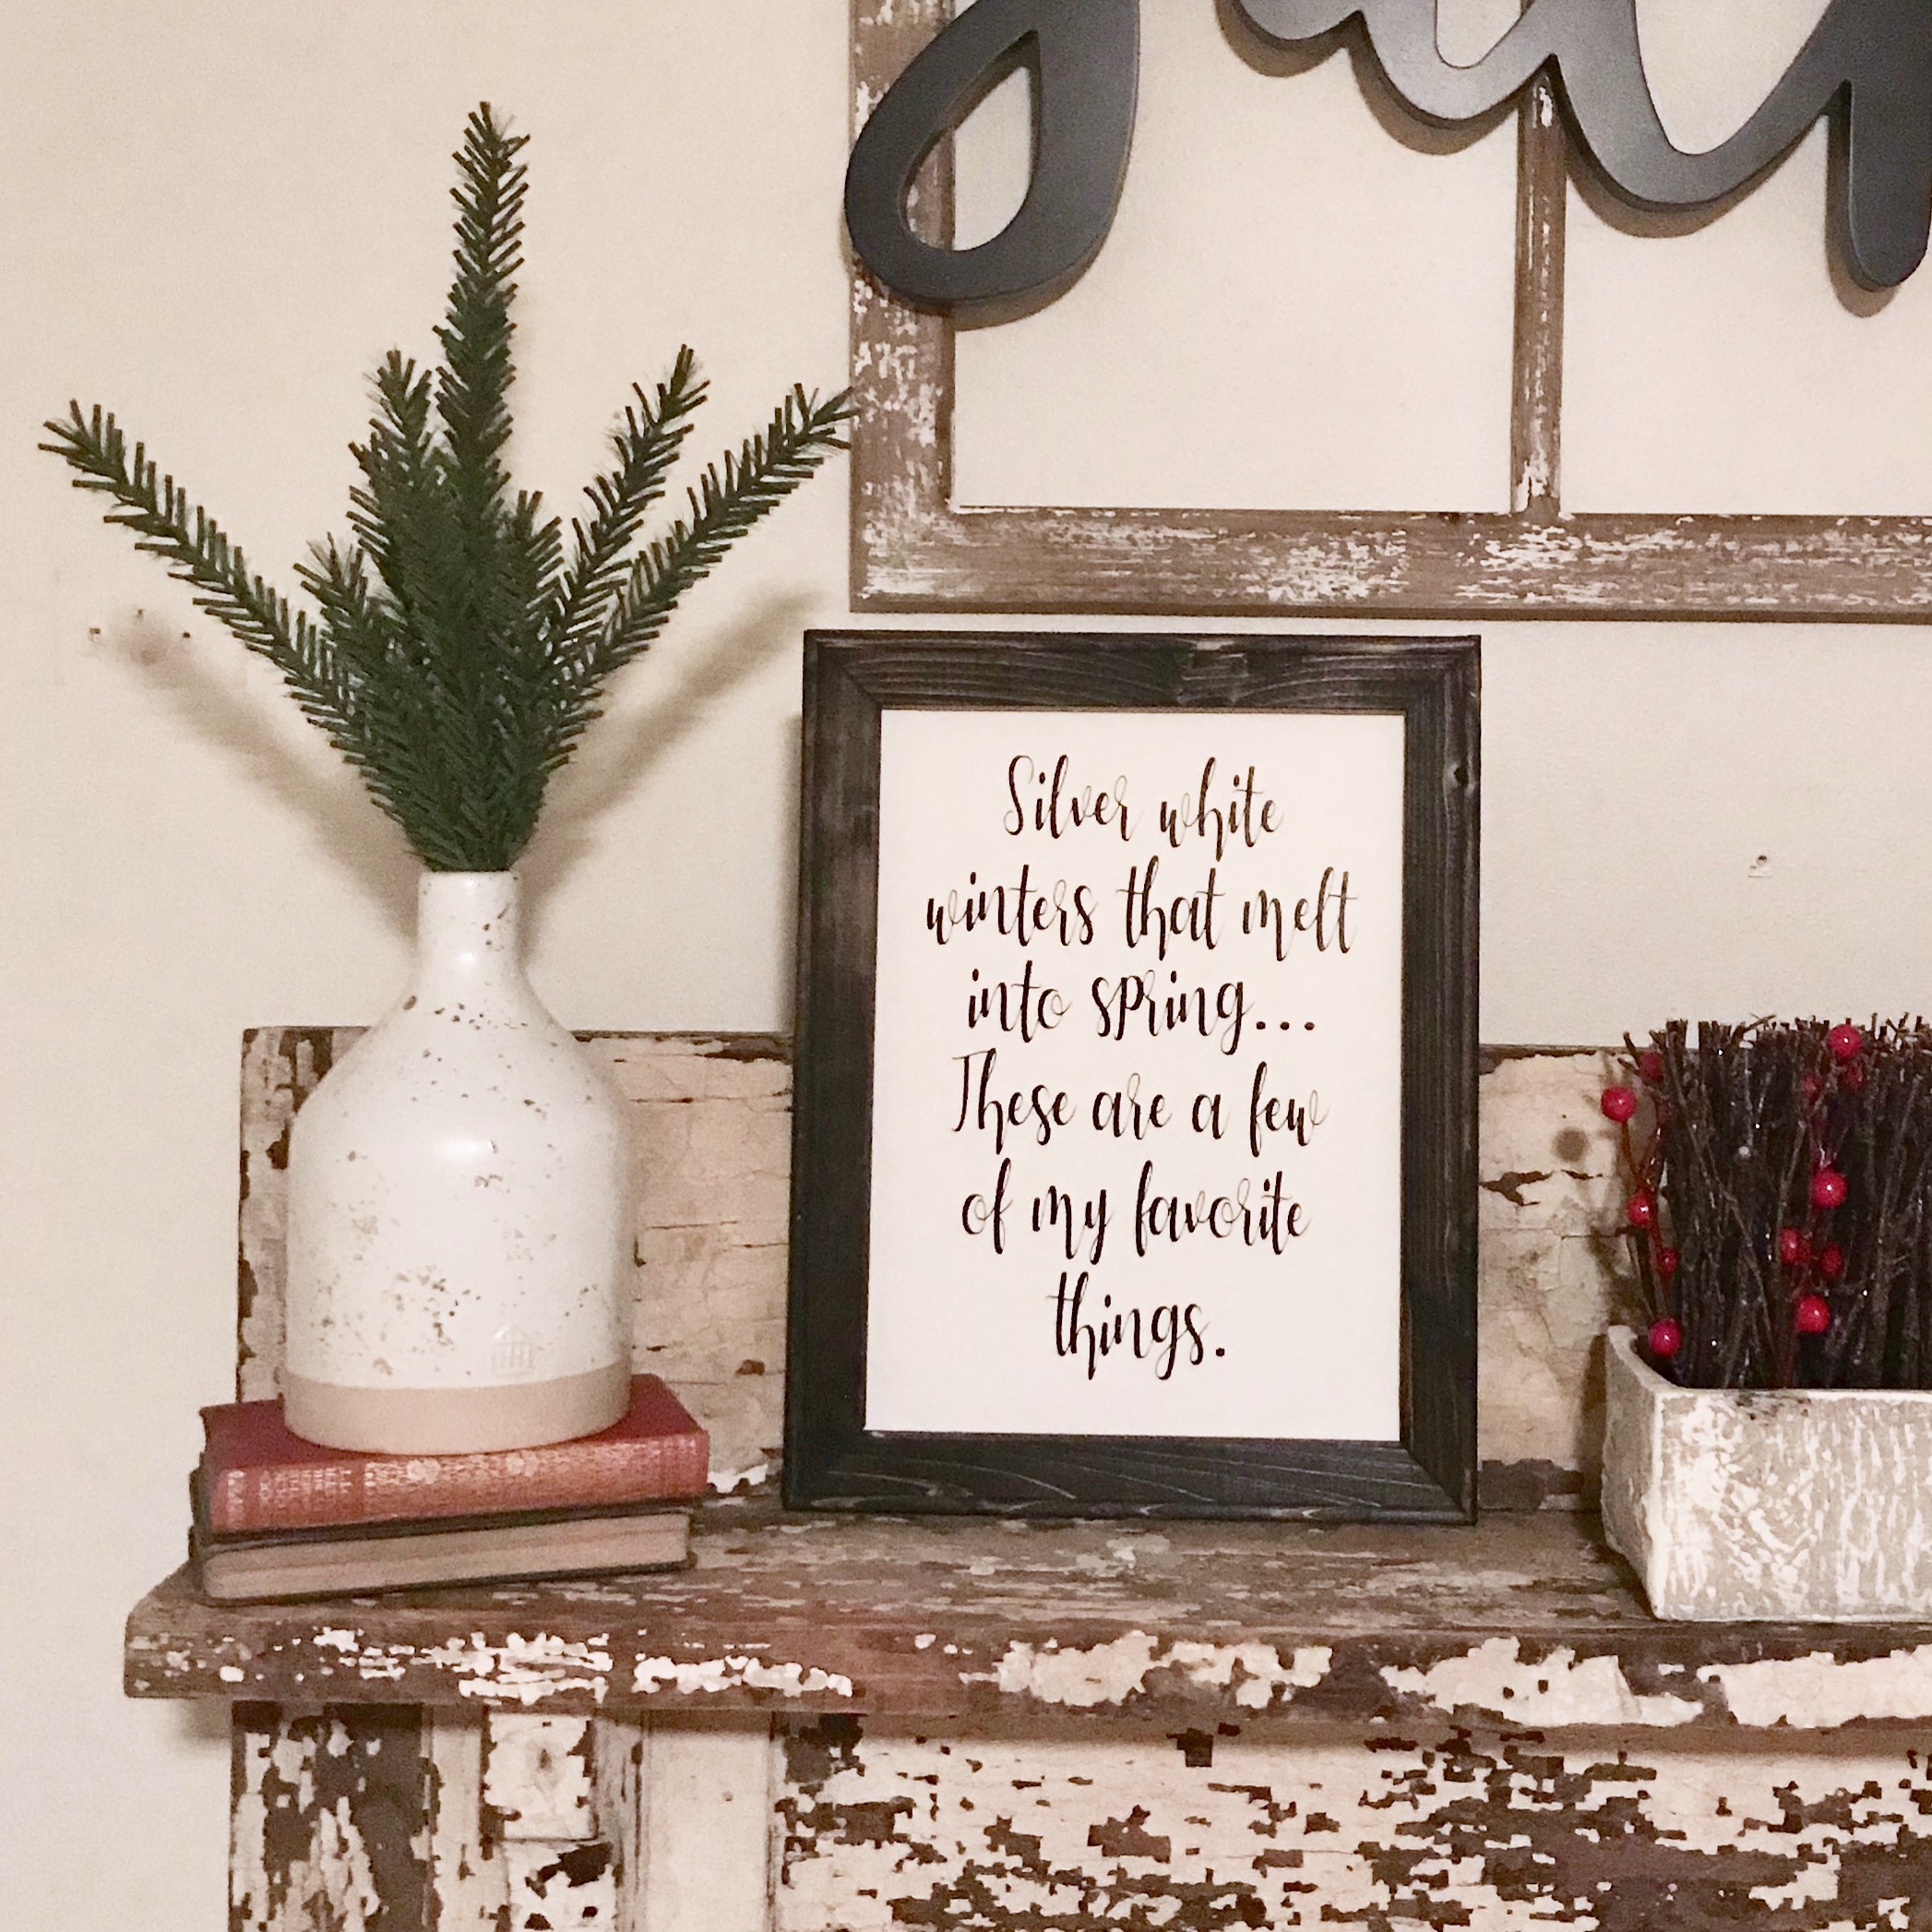
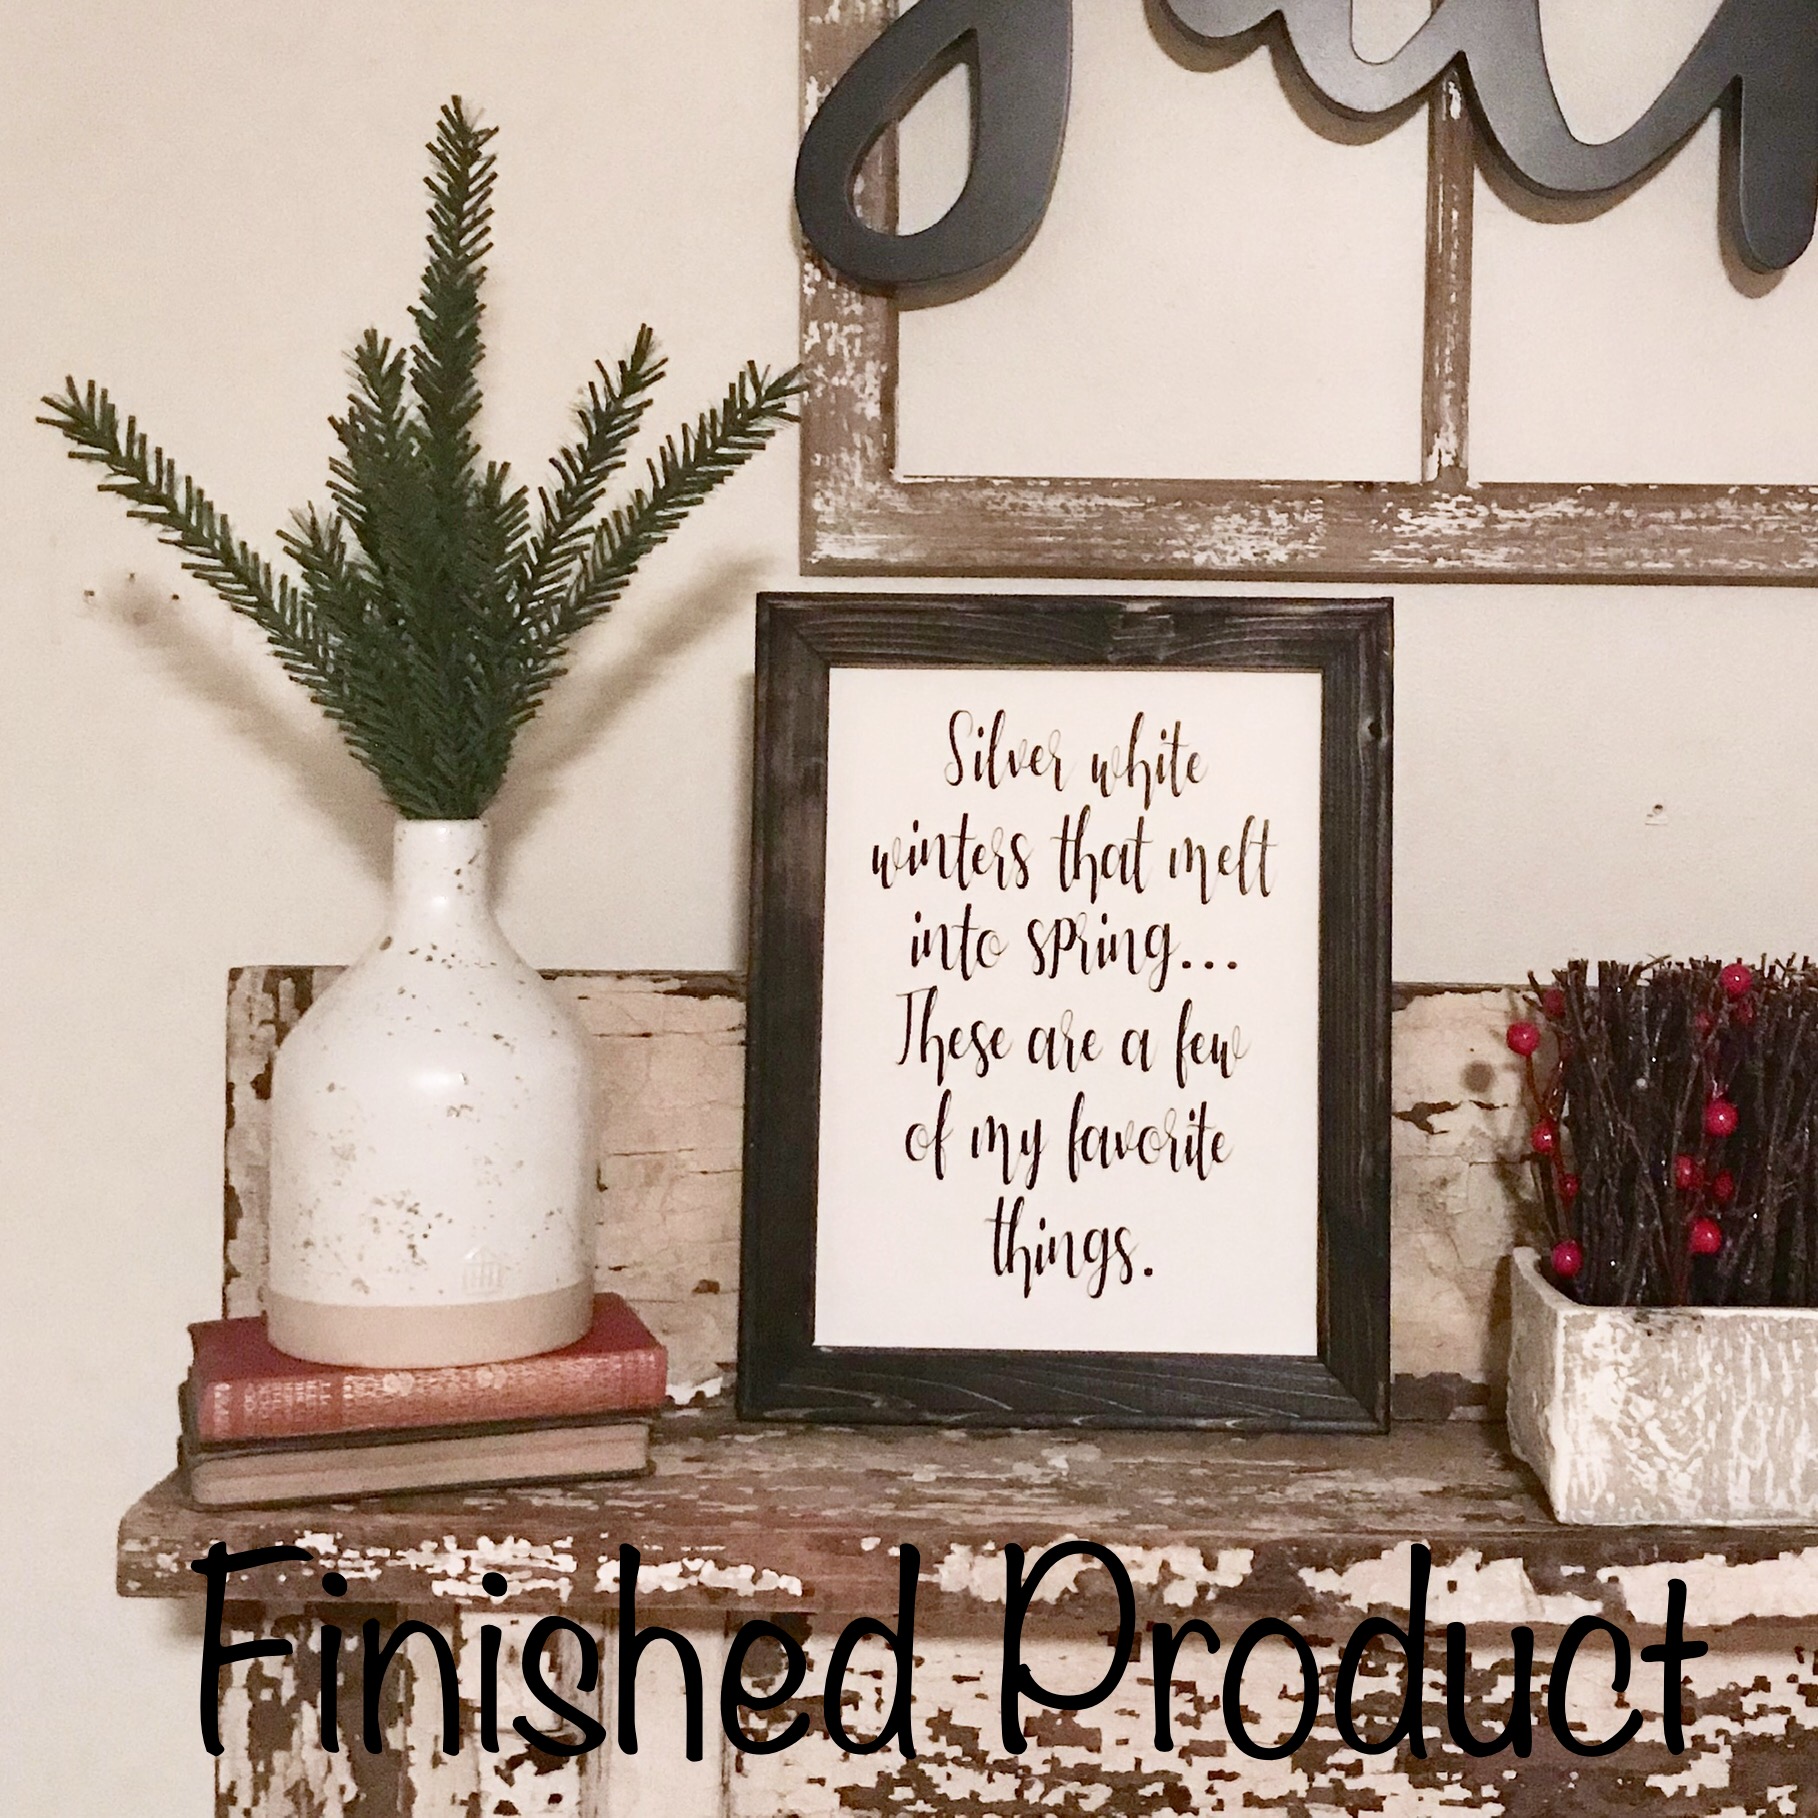
Finished Product- Reverse Canvas Print with Faux Hand Lettered Winter Phrase
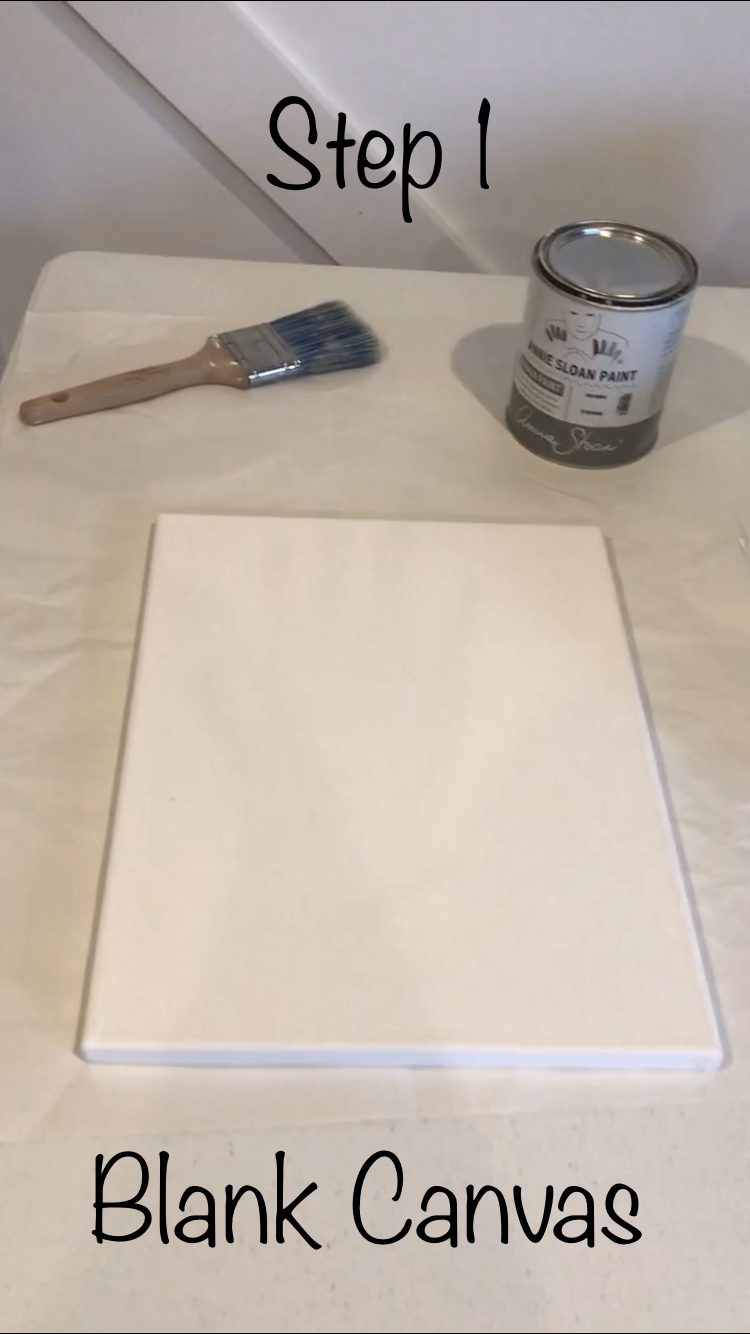
Step 1 & 2
Get a canvas that meets your needs as far as the size you want for your finished product. Mine is an 11×14.
You can find a two pack value pack of canvases for a great price at the craft stores or use a coupon at Hobby Lobby or Michaels if you just want a single canvas.
Side note- download the Hobby Lobby app on your phone & you always have a 40% off coupon available to you to use on a single non sale item (you can also use it on something that is on sale for less than 40%. So if the item you want is 30% & you don’t need the coupon for something else, you use the coupon to get an extra 10% off. My Hobby Lobby does this if you ask, so yours probably will too.) Also Michaels will accept competitor coupons.
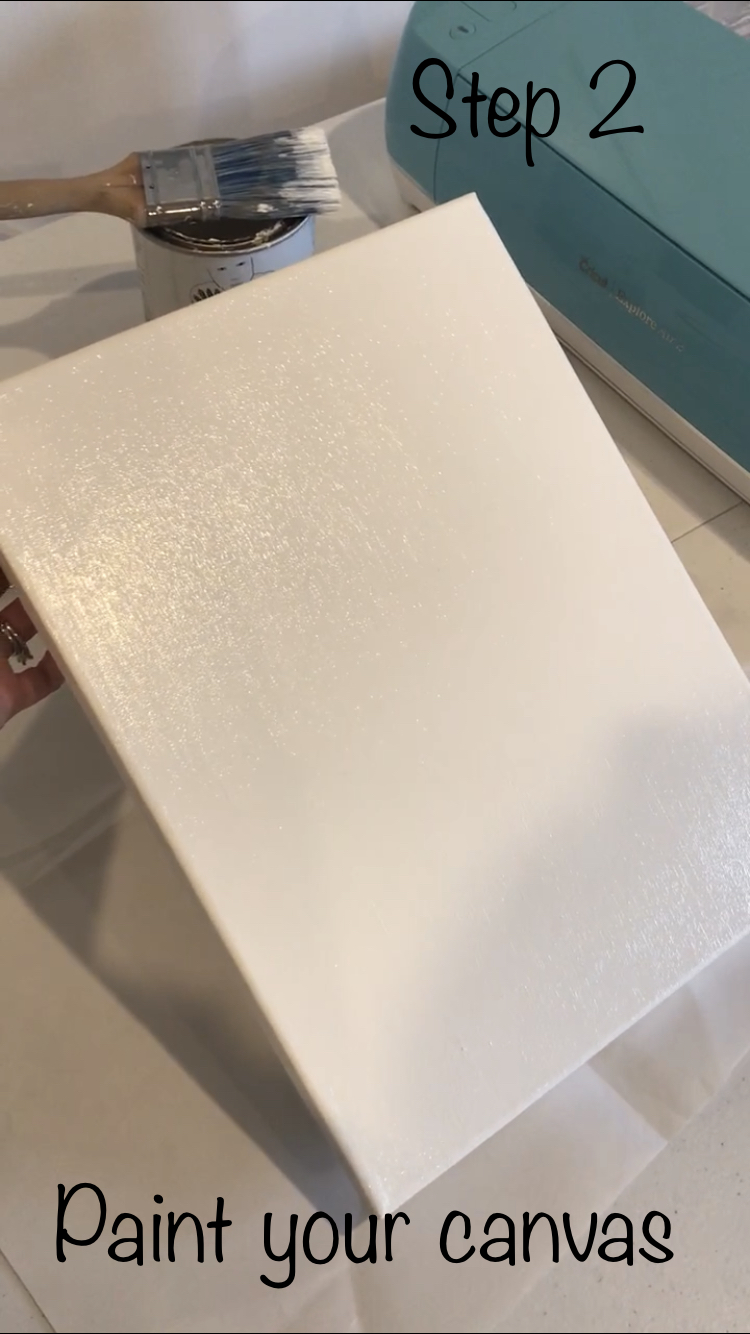
If you are doing ‘faux’ hand lettering or putting an image or stickers of any kind on your canvas you need to paint it first so that the adhesive sticks better. If you have beautiful handwriting & want your background to be white, you don’t really have to paint it unless you just want to.
I chose to paint my canvas in Old White Annie Sloan Chalk Paint, its something that I already had on hand & it best matches the colors in the Hearth & Hand Print in the above picture. I only applied one coat because my paint is a light color. If you were painting your canvas a dark color, you might would need a second coat. Let your first coat dry & see what you think. You just need to paint the top of the canvas, don’t worry about the sides they won’t be seen so don’t waste your time painting more than you have to!
Let your paint dry. I painted mine & then ran a few errands.
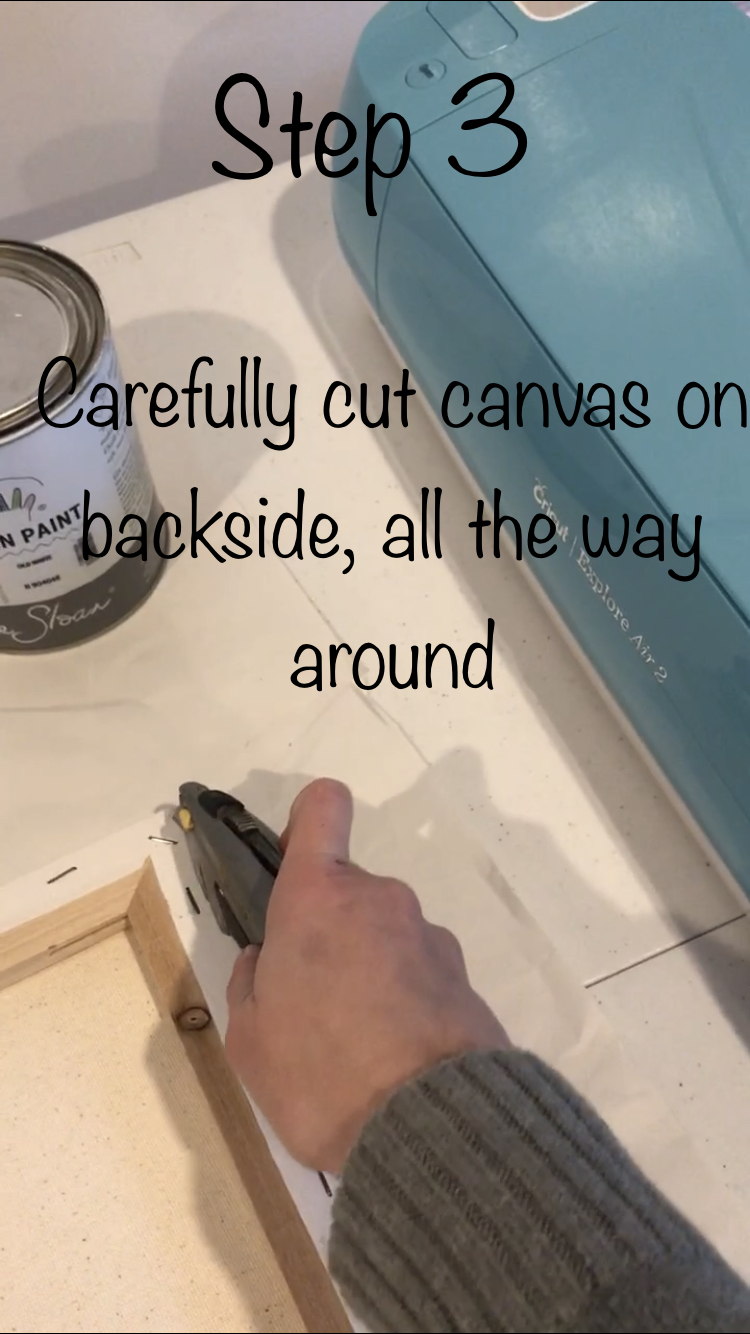
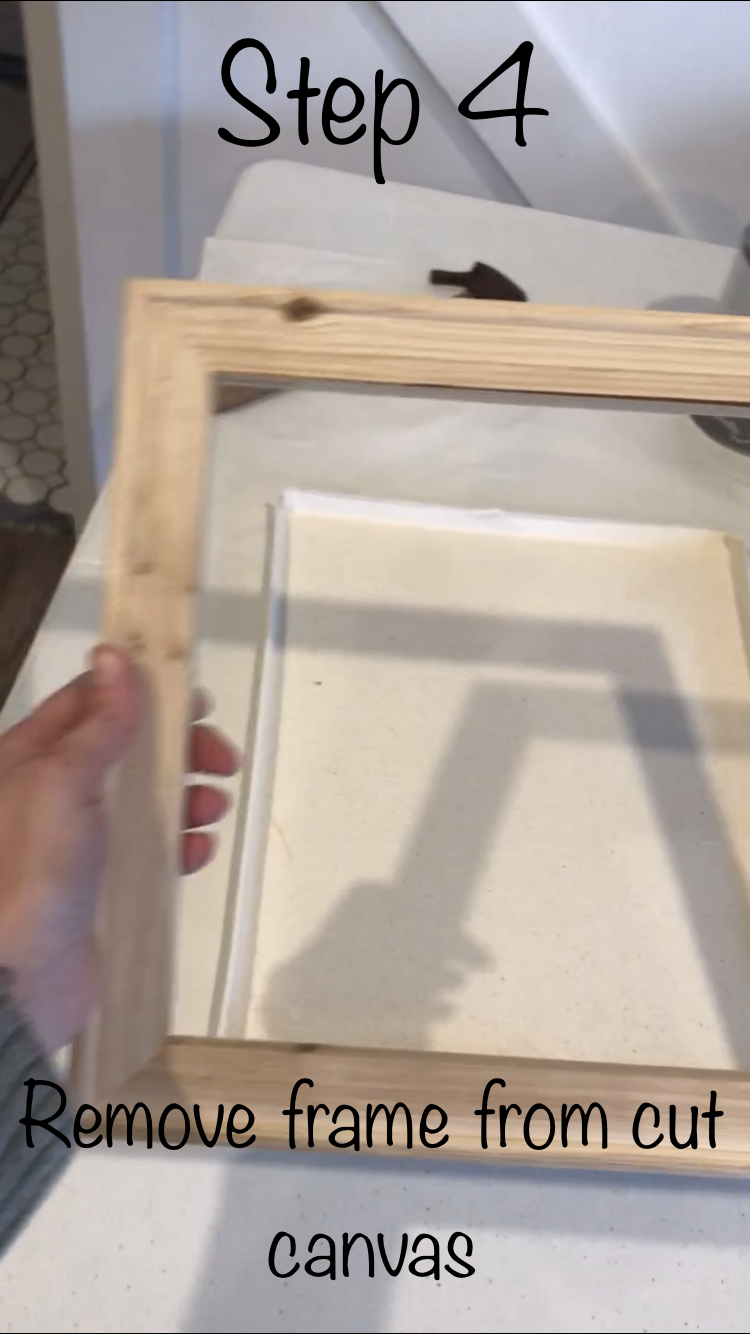
Step 3 & 4
Next you have to cut the canvas off of the frame.
Turn your canvas over & with an exacto knife or box blade knife, carefully cut around all four side of the canvas.
Release the corners of the canvas after making your cuts around the sides- mine were kinda folded like a present. After doing this, lift your frame away from the canvas.
Sorry this picture is a little blurry- I took screen shots from my video. Link will be provided below.
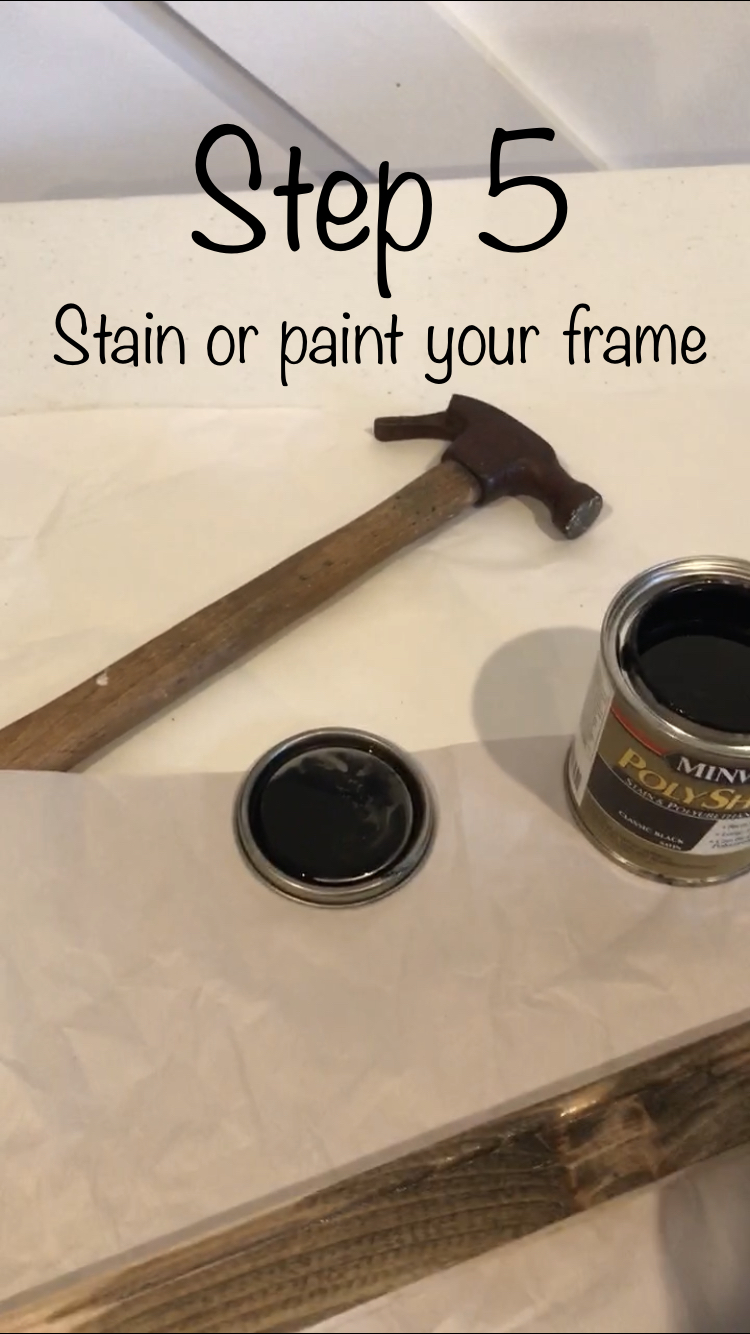
Step 5
Next paint or stain your frame. You may need to do some sanding- mine had a few small rough areas but nothing that I really felt like required sanding.
I decided to stain my frame in a classic black stain from Minwax. The frame on the other side of the mantle is black so thats why I choose black stain. I ended up putting two coats of stain on the frame, it took to the stain pretty good given that wood is pretty cheap! I had black chalk & latex paint on hand but staining was a quicker process. I let the stain dry a few hours.
Side note- I always use a soft cloth to apply stain, I think you can get better/more controlled coverage with a cloth compared to a brush. Also do your finger nails a favor & wear disposable gloves!
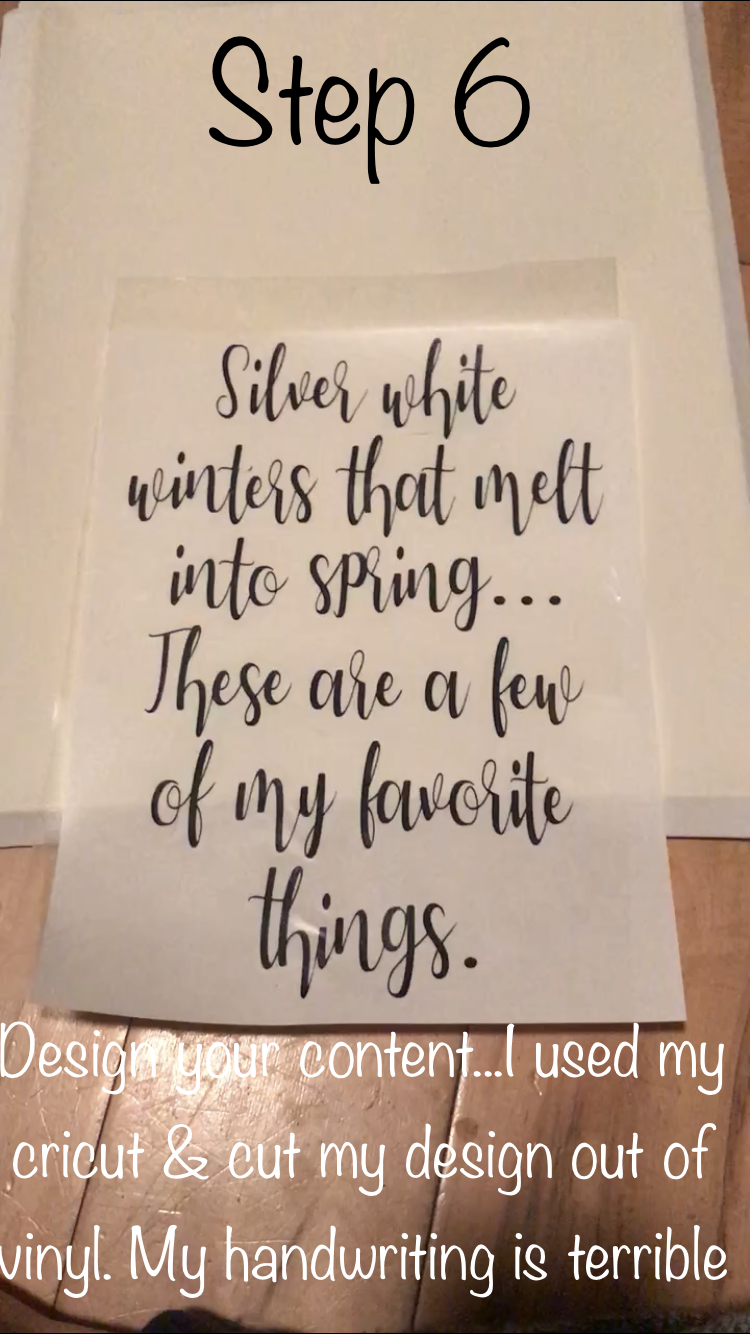
Step 6
Design your content. I used Cricut Design Space & my Cricut machine (I have the Explore Air 2) to cut a hand lettered looking winter phrase out of vinyl. As I said earlier, I don’t have great handwriting.
The Sound of Music is one of my favorite movies so I decided to go with the phrase ‘Silver white winters that melt into spring…these are a few of my favorite things.’
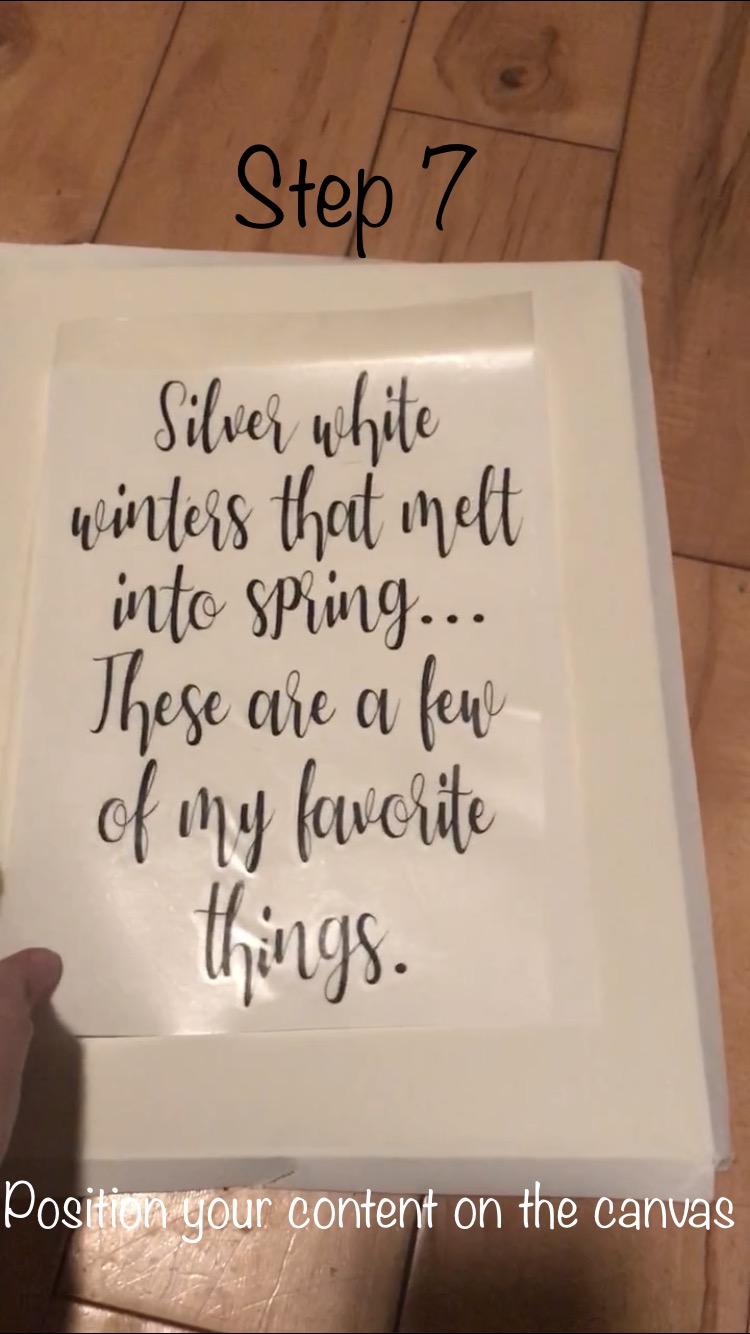
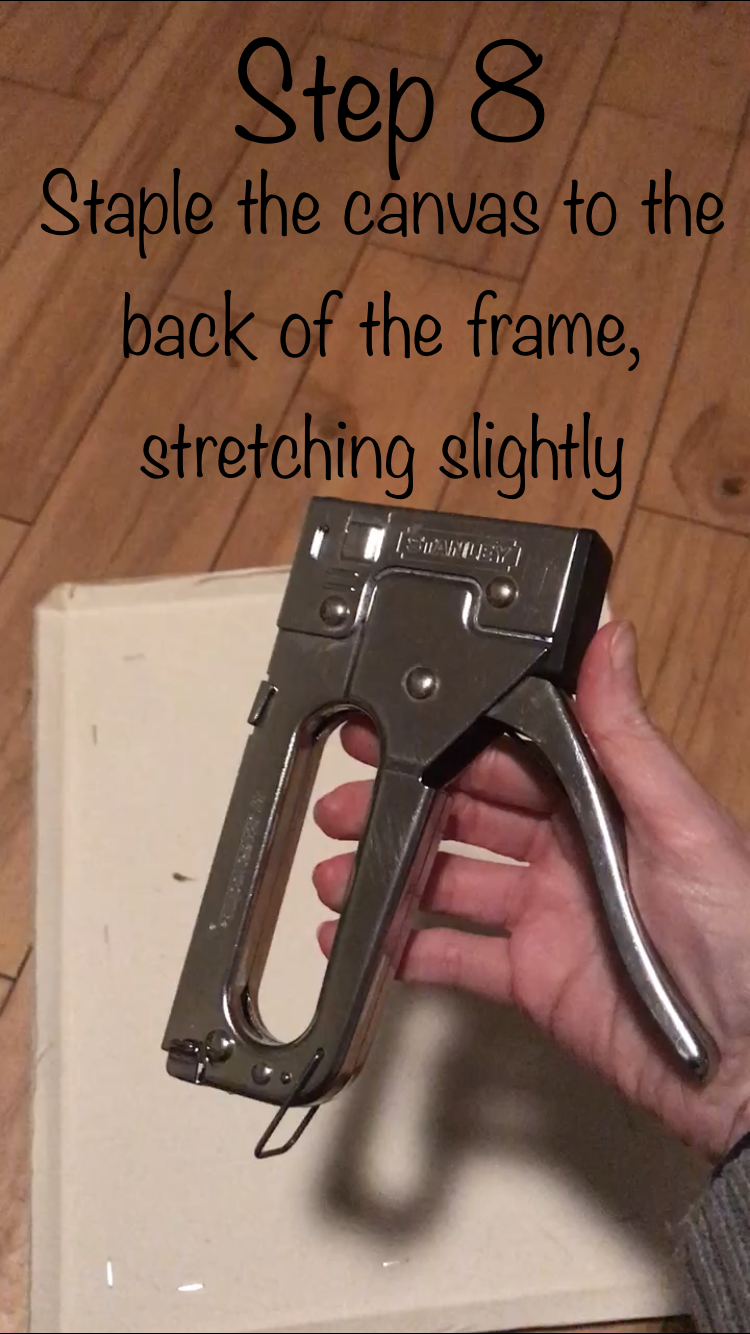
Step 7 & 8
Position your content onto your canvas or write it if you are a hand lettering type (so jealous if you are ;-)!!
I don’t have a picture of this (you’ll see it in the video tutorial) but place the frame on your content & center or position the frame how you want the finished product to look. Mark the canvas so that you can be sure it does not move when you turn the frame over.
Next take a stapler & staple your canvas to the back of the frame, just be careful not to get too close to the edges so you don’t split the wood. I did slightly stretch my canvas so that it didn’t look loose or baggy.
Step 9
Trim the excess canvas with scissors & voila…you have a great, budget friendly new piece of home decor!!
Be sure to check out my video tutorial of this project! (please ignore these walls in this room, we haven’t given this room its facelift yet).
I hope y’all found this to be helpful! My goal is to blog on a very regular basis this year with lots of DIY projects & tips! Be sure to sign up to get notifications for new blog posts! Happy 2019 Friends!!
Products in photo from left to right:
Greenery: Hobby Lobby Christmas Stem
Jug Vase: Hearth & Hand with Magnolia from Target ($3.24 on clearance)
Vintage Books: Goodwill for $2.50 each
Reverse Canvas Sign: Canvas from Hobby Lobby ($4.99 for a two pack so approx $2.50 each but they were just sitting in my craft room). The chalk paint I had on hand already. I also already had the black vinyl (it was Joanns Brand, I either use that or Oracal Brand). I did buy the stain because I needed new black stain.
Centerpiece: Threshold brand from Target ($4.99 on clearance)
Antler Sign: Hearth & Hand with Magnolia from Target ($4.99 on clearance)
Deer: Hobby Lobby Christmas Decor- I had them on my mantle for Christmas decor also